Christmas Inspiration!
By Lazarus Redmayne
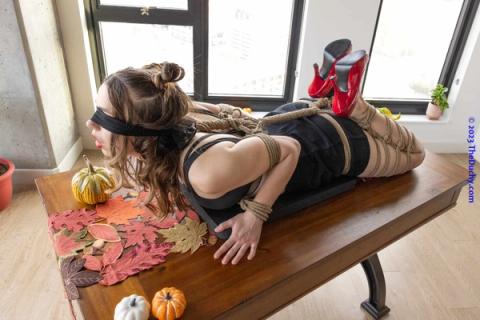
Decorate yourself or your partner for Christmas! Bring some holiday spirit to your bondage!
This page contains holiday versions of ties found here on TheDuchy. We do not repeat the instructions of the tie itself, but will give tips when a small modification is needed.
Take these pictures as inspiration for your own creativity!MFP is great stuff! It is soft, strong, waterproof and machine washable. The colors don’t bleed or fade. If you are in the market for colored rope, check out AgAg! If you use this link, it will give you 5% off orders over $35. Also, check out their IG for more inspiration.
Example of applying this method:
I like this version for harnesses. This hides the ends better.
Example of applying this method (excerpt from the Christmas Barre Harness below):
Some of these are not traditional modeling pictures, but she was laughing her ass off at one point and I thought a few of those pictures were adorable ... so here you are! :)
These are tied as per the standard pattern--with the exception of me ending the CHC harness before doing the second side--so I will not add more commentary. Here is what it looks like from multiple angles.
This follows the ideas presented in the Kinoko Neck Corset tutorial.
In this version, I experimented with having ropes just trail downward from the back of each leg as a sort of tassel. That can be fun, but the original tutorial has many other great ideas for using up the tails!
Here is what it looks like from various angles.
Rope Needed
For this tutorial, I used various lengths and various colors of MFP (multifilament polypropylene), provided by my affiliate AgreeableAgony.com
Step-by-Step
1. Choose two cords with colors you like
2. Simply tie the ends together with an Overhand Knot
3. This point now becomes your bight
1. Simply treat the joined rope just as you would a folded rope, using the knot as your bight.
This is the beginning of me tying a Lark's Head Double Column
2. ...pull the tail through the bight and...
3. ...continue to tie from there...
4. ...just as you normally would...
1. Choose two cords with colors you like.
2. Create a loop.
3. Reach through that loop and grab the tail.
4. Pull a small loop of that tail through.
5. Pull the ends of the rope and that small loop to tighten the running Overhand Knot.
6. Now treat this loop like your bight.
1. Start with a slip knot, connecting your two rope together and giving you a bight.
2. Run your tail around your partner and through that bight. Tighten.
3. Now proceed with tying the Barre Harness as you would normally.
4. Done!
1. Start with a slip knot, connecting your two rope together and giving you a bight.
2. Run your tail around your partner and pull a small loop through that bight. Then continue tying the Chain Stitch Corset as usual.
3. Here on the back side, I used a 4-under + 2-over pattern.
Beginning: - Run the tail upwards under the first two strands, closest to the skin - Pull the tail out so it is above the strands - Reverse tension so the tails point downward - Go over two strands (each on the respective side) - Tuck the tail under the strands again and reverse tension so that it again heads upwards, closest to the skin - Then...
Continuing: - Run the tail upwards under four strands, closest to the skin - Pull the tail out so it is above the strands - Reverse tension so the tails point downward - Go over two strands (each on the respective side) - Tuck the tail under the strands again and reverse tension so that it again heads upwards, closest to the skin - Repeat.
1. Tie the double-stranded (4-cord) variant of the Diamond Dress. I picked Red and Green for mine.
I chose to not include the lower two Double Coin Knots. In retrospect, I should have included them.
2. Different angles
3. ...
4. ...
5. On the back, I used up rope using the Cored Square Knot. I used up the inner two strands on each side between the shoulder blades and then used the outer two strands on each side to connect into the front and then connect into this stem again using Cored Square Knots.
Note: To keep things looking organized, I made sure that the green rope was on the bottom every time I reversed tension. Similarly, I made sure that the green rope was on the inside track of every turn.
CHC+LoveHandles (1)
CHC+LoveHandles (2)
CHC+LoveHandles (3)
CHC+LoveHandles (4)
CHC+LoveHandles (5)
CHC+LoveHandles (6)
CHC+LoveHandles (7)
CHC+LoveHandles (8)
CHC+LoveHandles (9)
Kinoko Neck Corset (1)
Kinoko Neck Corset (2)
Kinoko Neck Corset (3)
Kinoko Neck Corset (4)
Kinoko Neck Corset (5)
Kinoko Neck Corset (6)
Kinoko Neck Corset (7)
Kinoko Neck Corset (8)
Kinoko Neck Corset (9)