Trussed Like a Turkey
By Lazarus Redmayne
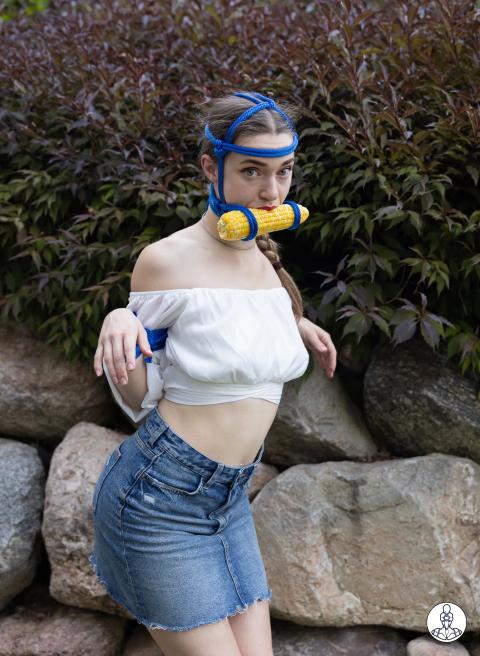
Blue is trussed Like a turkey. Here is one way to tie your partner like a feast table centerpiece!
(Context: The United States has a major holiday called “Thanksgiving”, a day focused on celebrating friends, family and other things we are thankful for … and which includes a traditional meal. That meal often features a roasted turkey as a main course. That traditional dish inspired this position and predicament.)
Scene Credits
Prerequisites


Scene
- Start with a Shinju with an optional extra wrap on the top strap to better distribute the force.
- Add a Slipped Somerville Bowline around each bicep. Let the tails drop for now.
- Add a Spiral Futomomo to each leg. (Alternatively, you can use a Double Column.)
- Add a new rope to each ankle cuff, with the tail leading toward the torso. You can use a simple Lark’s Head Knot to do so, or use a Woven Lark’s Head as shown in Details below.
- Bring the tails from (4) up to and under the upper chest strap. (Optional) Pull them to pull your partner into an arch.
- Wrap the tails around the stem to use them up.
- If you have a lot of rope left over like I did, you can also use it up by running the strands around the body.
- Use the tails from (2) to pull the arms toward the back. Run the tails under the stem to hold the arm cuffs in place, then use up the extra rope by wrapping it around the upper stem.
- (Optional) Add Single Columns to each wrist, then connect them together in front of the chest so that the arms cannot be straightened.
Step-by-Step
Our planned scene will have my partner in a challenging position. It is important to stretch! Here Blue is stretching her arms and shoulders…
…and then legs.
Add a Shinju (or any other chest harness with good support for the upper chest).
The back of the upper strap will act as the connection point for the ankles later in the tie.
Add a Double Column to hold each arm in a “chicken wing” … or a turkey wing, I guess, given our plans for this scene.
Tuck the ends of the rope inside to make things look neater.
Position your partner where you want them to be. (We added a pad under her to make breathing easier.**) Then truss their legs. We decided to go with the Spiral Futomomo. You could, of course do so using any other Futo or just a Double Column/Frog Tie.
** If a person is wearing a chest harness it makes it harder to breath with the chest and they usually shift to breathing with their diaphragm. But if you then make breathing with the diaphragm more difficult in some way – in this case by laying them on a hard surface and then tying them in such a way that their back is arched – you risk positional asphyxia. To reduce that risk, we introduced the cushion, so that the surface is not as hard and she can more easily breath into it.
Futo the other leg, too.
At this point we discovered an issue. Blue had been doing her sensory and motor checks and discovered that her pinky was feeling numb. We tried to move the band of rope, but were not able to alleviate the nerve impingement (her arms are sensitive to ulnar nerve impingement when held tightly bent). So…
We removed that part of the tie. She kept doing her sensory checks and a few seconds after we got her arm straightened, the numbness subsided.
So, if we are to get her wings trussed like a turkey, we will have to do so another way. I decided to add a Slipped Somerville Bowline to her upper arm instead.
I chose the Slipped variant so that I could untie her in seconds if the numbness returned later in the scene.
Next I want to connect the ankle cuffs to the chest harness so that I can pull her back into an arched position. I want to make sure that the strands of the ankle cuff do not get bunched together, so instead of using a simple Lark’s Head to add a new piece of rope, I will weave the bight under the first two strands, over the middle two and under the last two strands, like this, then…
…reverse the direction of the tail and weave it under the middle two strands and the bight, like this.
You can obviously do that weaving at the place on the cuff that you want the connection to be, but because I want it to be between the ankle and the leg, I made the weave here, where it is easier to see, and will now move it around to the position I desire, and then tighten it down.
Complete the same connection point on the other ankle, then run the tail up to the upper strap of the Shinju. Go in on the same side of the stem and exit on the opposite side.
Run the tail from the first ankle up under the upper strap of the Shinju, as well. Again, going in on the same side of the stem and exiting on the opposite side. Pull the tails all the way through, connecting the ankle cuffs firmly to the chest harness. (Optional) Now you can lift your partner’s knees off the table with one arm, bending them into an arch, while at the same time pulling both tails coming from the ankles. This will lock them into that arched position.
Important: There are risks associated with back bends. They are not appropriate for everyone. Discuss this with your partner first, perhaps do a little testing so you know what level of bend – if any – is appropriate for them.
Wrap the tails around the stem to use them up. (There are four strands here that I treated as if they were one tail.)
If you have a lot of rope left over like I did, you can also use it up by running the strands around the body.
Bring the tails from the upper arm cuffs under the stem and reverse tension, then pull the tails to bring the arms back. Lock off then use up the extra rope. One possible way to do so is to wrap the tails around the shoulder straps.
(Optional) Add Single Columns to each wrist, then connect them together in front of the chest so that the arms cannot be straightened.
Done! (She’s ... a'hem ... “cooked” 😊)