
快速承重双立柱
By Lazarus Redmayne
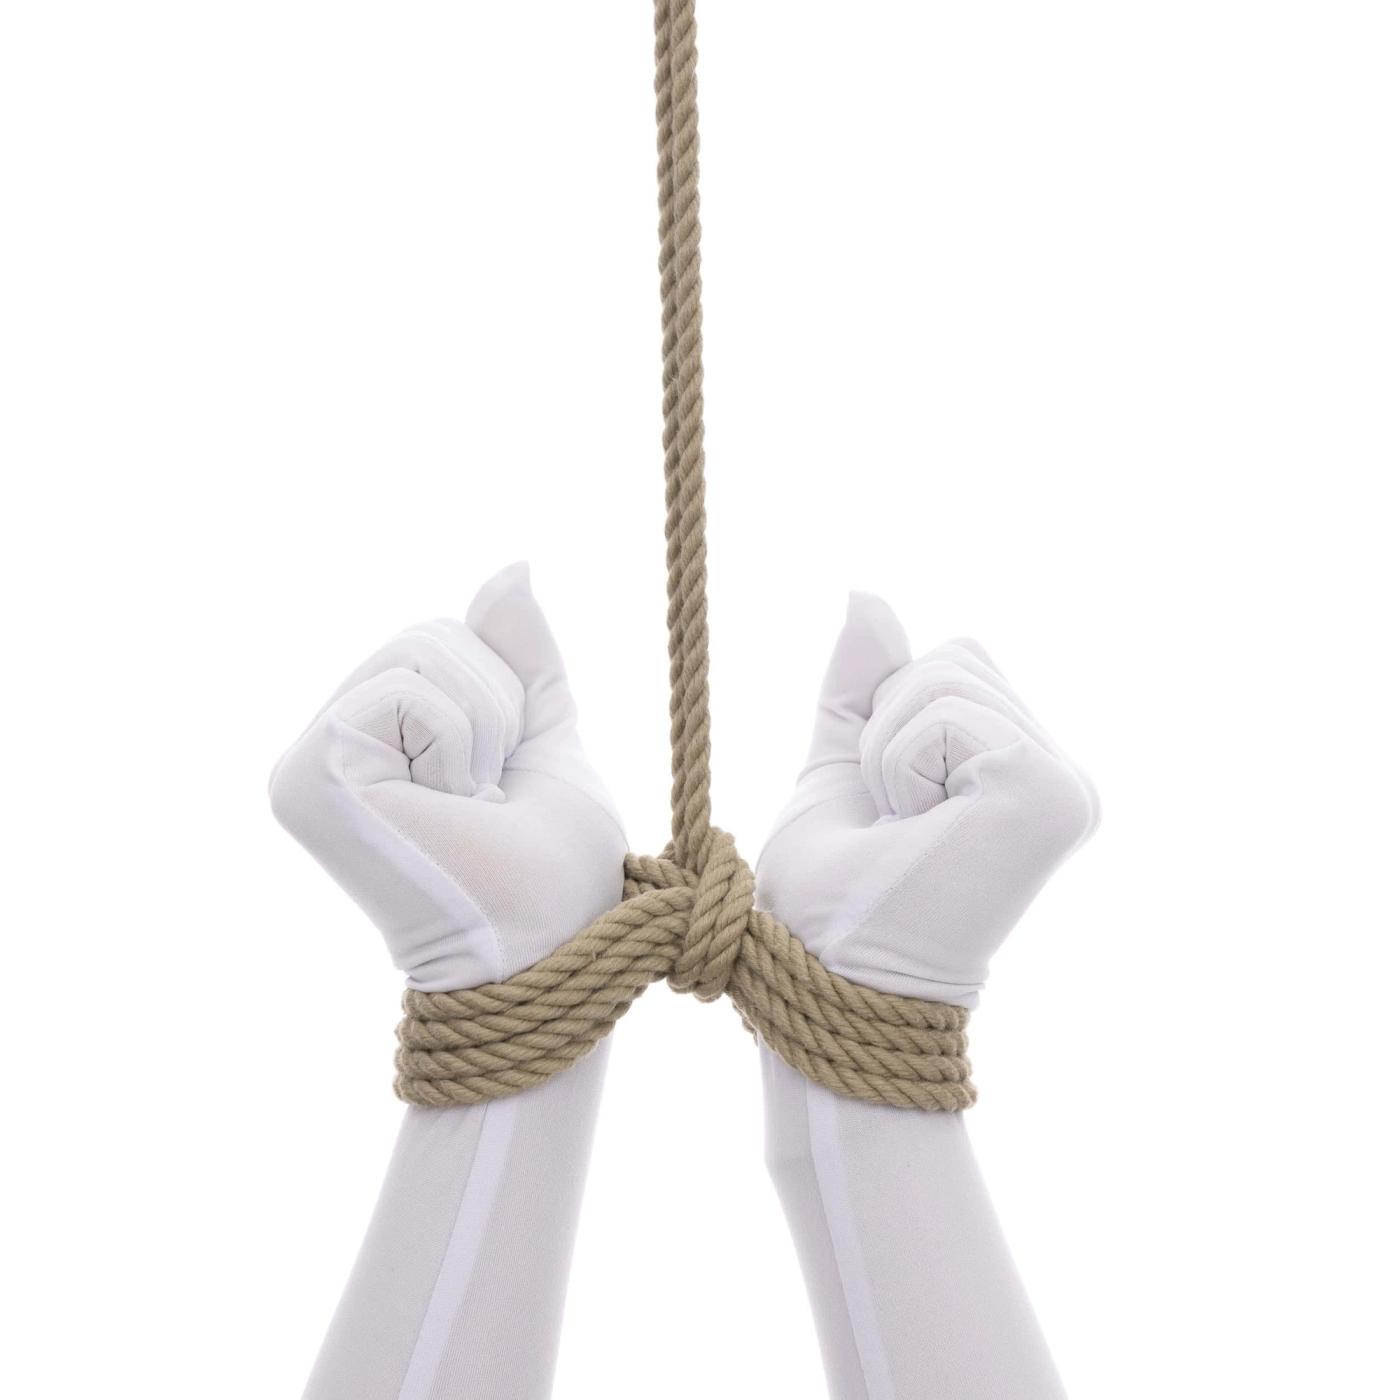
这种“云雀头双柱绑缚”的简单变体系起来很快,且适用于承重情况。所谓“承重”,是指被束缚者可能会用力拉扯束缚的情况。 例如,将人的手腕绑缚在床头板上,以便他们在场景中可以用力拉扯束缚;或者将手腕固定在头顶的坚固支点上,使他们可能向下拉扯手铐。采用这种技术,即使拉扯手铐,也不会导致手铐夹紧手腕并变得更紧。
Risk Management and Safety
This is not sufficient for any situation where the person is unable to relieve the tension. In the bed example, the person needs to simply stop pulling and the tension is relieved. When they relieve the tension, the pressure of the cuffs will be relieved. They are still bound, but the rope will no longer be digging in to their skin.
Attaching these to an overhead hard point can introduce more risk. You can use this to hold their arms over their head, but don’t pull them up so high that they are on their tip-toes and cannot relieve the pressure on their wrists. This is a dangerous situation. Even if you do leave them on their heels so they can relieve the tension, over time doing so may become more and more difficult. Always keep clear communication with your partner and keep their health as your top priority.
Do not attempt to use this or any other wrist-only rope technique to suspend someone.
Rope Needed
For this tutorial, I used Natural 1/4" (6mm) hemp.
I use an amazing Natural hemp rope provided by my affiliate Twisted Monk. Check them out!
Video
Detailed Step-by-Step Version (For those new to rope)
本版本为初次接触绳艺的新手提供了所有详细步骤!
如果将手铐戴在手腕上,请绑缚在我用两根手指指的地方——也就是手腕处靠近肘部的那块小骨头。这样可以确保手铐不会系得太紧,并避免损伤手腕内侧那个布满神经和血管的敏感区域。 没错,如果被束缚者挣扎,手铐自然会向手部方向滑动,但通过将手铐绑缚在此处,可以预留出一点缓冲空间,从而降低风险。
将咬痕横跨在手腕上。
用你的惯用手从下方伸过去,用手指勾住绳圈,手指朝手腕方向弯曲……
……然后将其拉到手腕下方。
你的手指已经放在那个弯处了,位置正好适合抓住尾巴。
钩住尾部,扭动手腕,将尾部从较宽、较易通过的通道中拉出来……
……形成了“云雀头”的形状。
现在反向施力(开始向相反方向移动)。调整这个次级咬合的位置,使其通道位于两个手腕之间的正中间,就像这样。
现在我们来设定袖口的间距。手腕之间的距离应比标准的“云雀头双柱结”或“经典双柱结”更宽一些。
你应该把它们之间的距离留得足够远,这样当你把袖口的线缝拢到彼此相触时……
37. ...... 就像这样......
……收紧的绳子与手腕内侧之间仍会有足够的间隙,让你能将手指伸进两侧的孔中。
这是一项安全设计,旨在避免对腕部内侧的神经和血管以及腕部本身的骨骼施加过大的压力。
既然已经设定好距离了,请保持尾端的张力,以免在朝另一个方向再绕一两圈时,张力发生变化。
缠绕时,应朝与绑缚后领结尾自然垂落方向相反的一侧进行。以本例为例,我希望领结尾从袖口朝手的一侧垂落,所以……
……我是在肘部那一侧缠的绷带。
将绳尾拉到与起始结(云雀结)同一侧。
用手指沿着次弯处滑动,方向朝向尾部。
将尾巴勾在手指下面。
弯曲手指,开始将绳子拉出来。
用另一只手控制尾巴的一端,以免在拉绳时尾巴乱晃。
现在将尾巴穿在两个手腕之间。花一点时间确认尾巴是否正好位于两者中间;如有必要,请调整其位置。
将手伸到前臂之间,抓住尾巴。
将线绕过袖口的所有线头,回到起始点。
将手指放在这条缠绕带的起始点下方。
将尾巴钩在手指下方,然后将尾巴往里拉。
至此,半结就系好了,它将作为我们的收紧结。
将袖口处的绳股捏紧,然后将半结系紧。
确保它能牢牢地扣住袖口的系带。
请再次确认,您是否仍能将手指伸入袖口两侧。
这是一座已建成的快速承重双柱结构。
现在你可以把这个尾部连接到某个地方……比如床头板或头顶的固定点。
Watch the tension on the wrists. Adjust periodically.
如果对方拉扯手铐,“半结”会紧紧勒住手铐的所有绳股……
……但袖口本身的褶皱不会再更紧地贴在手腕上了。
一旦你的伴侣停止拉扯,手铐就会恢复到最初绑缚时所达到的紧度。
这些袖口的结构将确保留有安全缓冲空间。
如果你的伴侣选择在绳索中扭动或挣扎,这些手铐几乎总是会向手部方向滑动,但只要一开始就把它们绑缚得离手部远一些,即使手铐滑动,也不会太紧。 此外,如果你发现手铐已经滑落,可以用手指从下方托住,将其推回原位。
14. 就像这样。
Highlights Version (For those that have completed Foundations/Rope-101)
如果您已经熟悉雀头双柱缚 而且,凭借良好的绳索操控, 这个结非常容易绑缚:
Artist's Corner
Inline Version - Detailed Step-by-Step Process
你也可以将其中一个绑缚成“直系结”——也就是说,从绳子的弯处开始绑缚,而不是从绳圈处开始。
(这与在珍珠绳束(其中,下胸带只是一个“云雀头”双柱结,上胸带也是“云雀头”双柱结,只不过是起结方式不同的直列式版本,除此之外完全相同。)
从绳圈开始打“快速承重双柱结”时,先从绳圈开始,将绳尾穿过绳圈,然后反向施加张力,接着……
……进行缠绕,并绑缚。
你也可以直接在绳子上操作,只是起法不同:将绳子拉到你想让束缚开始的位置——本例中是手腕——然后用一只手固定住绳子,另一只手将绳尾绕过手腕。
……将尾巴从下方绕过……
……反向张力。
接下来,你只需像系普通承重双柱绑缚一样完成这个绑缚。 在这种情况下,我希望系好绑缚后,绳尾能自然垂向双手一侧,因此我会朝与绳尾最终自然垂落方向相反的一侧进行缠绕,换句话说,第二圈缠绕是在远离双手的一侧进行的。
将线尾穿过次弯,然后决定如何收尾……
结束 1
现在你有几种选择来决定接下来该怎么做。你可以——这也是我们制作标准“云雀头双柱结”的方法——将尾部的绳股分开……
……然后将绳子分别沿袖口两侧向两个方向各绕一圈,再将它们拉回起始点,并用平结打紧。
该版本将呈现如下样式。
结束 2
或者,你可以像我们处理“快速承重双柱结”那样收尾:将尾部的两股线捆在一起……
……将它们绕在袖口两侧……
……然后把它们叠在一起……
……然后拧紧
如果你打算用这种方法绑缚,请确保在上文第5步和第6步中,手腕之间留有足够的空间,这样当这个收尾部分收紧时,绳索才不会压迫手腕……即手腕内侧与收紧带之间要有空隙。