
Bamboo Bondage - Attaching
By Lazarus Redmayne
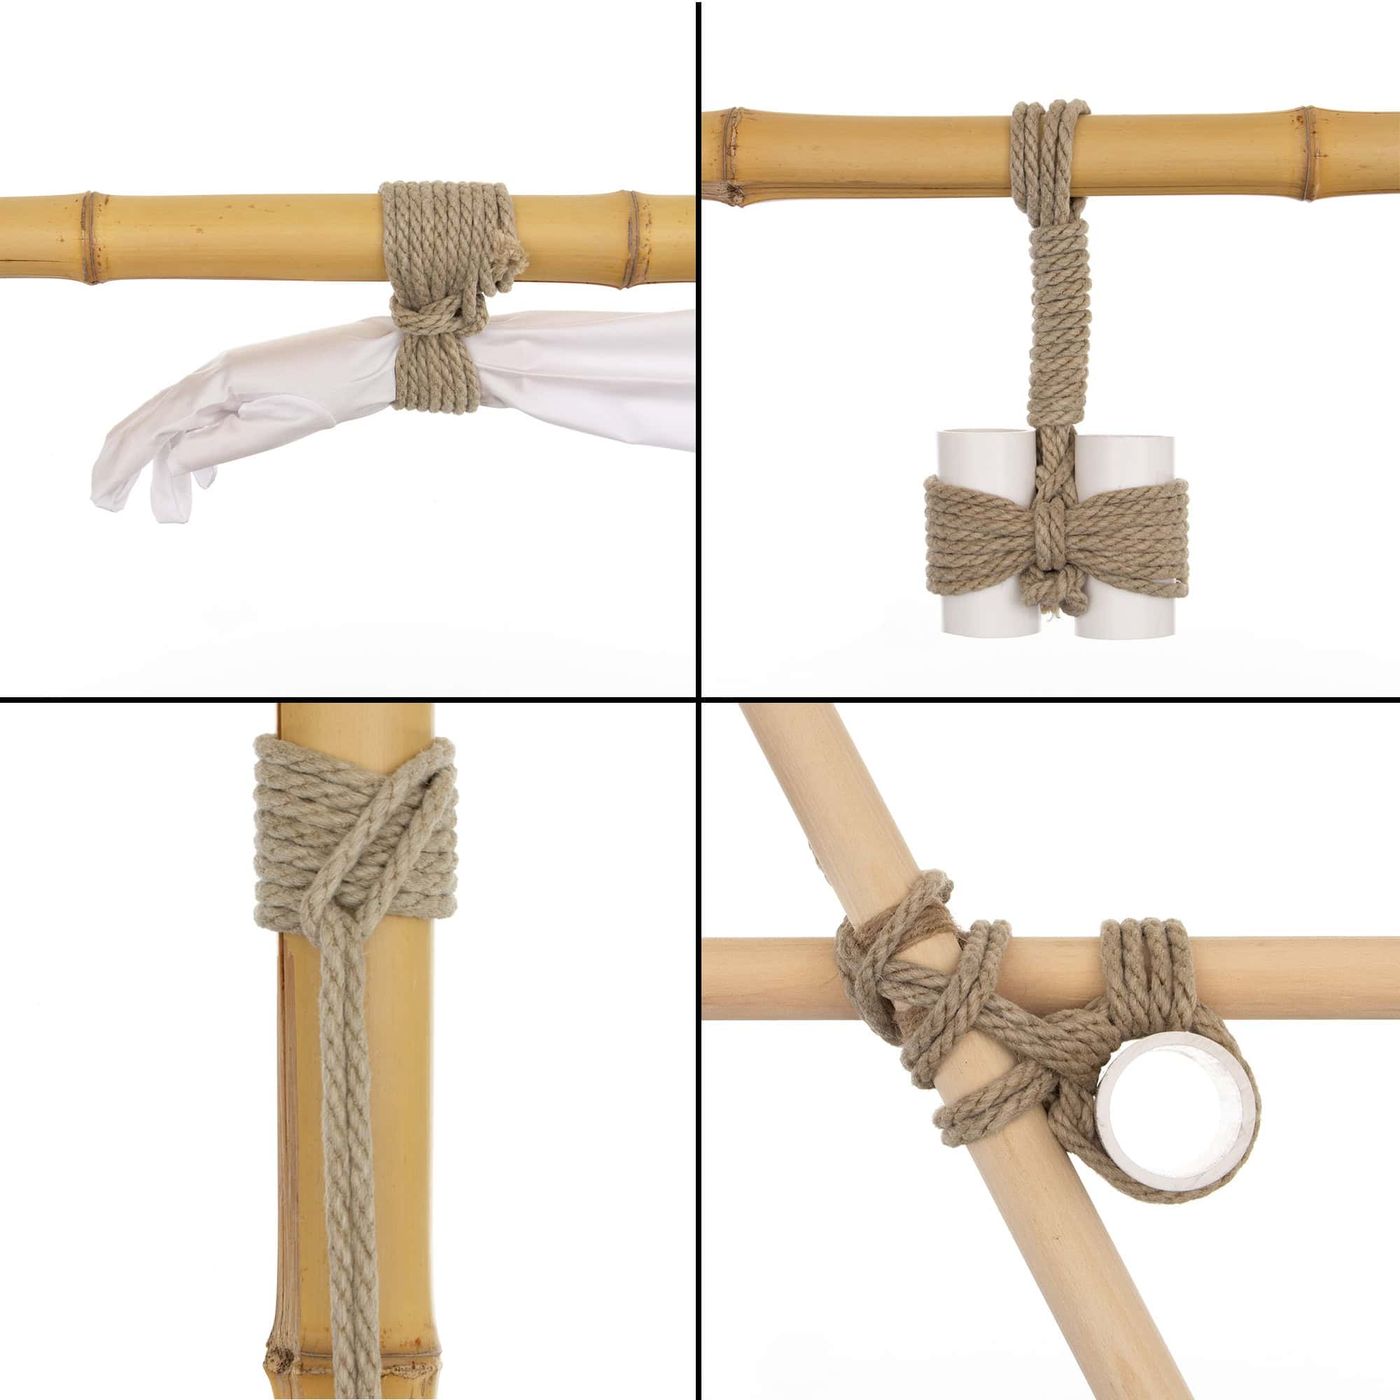
Attaching to Bamboo Bondage
By attaching bamboo bondage to your scenes you can get even more variety by incorporating a bondage frame. These are often made by add rods of bamboo, perhaps tied together in some form of frame.
Creation of a frame and related techniques are the subject of other tutorials, but regardless of which you choose, you will need to attach your partner to it. That is what this tutorial is all about!
There are many, many ways to attach your partner to a frame. You may have rope already on them and wish attach the rope to the frame. You may wish to start with them free and tie them to the frame with a fresh piece of rope. You may wish to tie them directly to the frame or to allow them a a little bit of tether, and a little bit of freedom of motion (and therefore greater frustration when they realized that that does not help them get free).
This page shows you many different methods for attaching your partner to a pole or a frame. There are many others not included here. Find what you liked best.
Safety: It is vitally important that you keep safety in mind when tying someone. When you create a cuff, you need to be able to slide at least two fingers into that cuff, between the rope and their skin; if you cannot, it is too tight. I point this out a few times in the below, but not every time. Remember to keep safety in mind at all times.
One technique that I do not like, is tying a wrist or ankle directly to a pole using a Square Lashing or related technique. It is far too easy to make the ropes too tight and, while this can be done safely if the rigger is being extremely careful, my personal opinion is that it is too easy to make a mistake, and I don’t normally recommend this technique.
Note: On this page I sometimes use white PVC tubes or hand forms to stand in for wrist, ankle or neck. I do this so that you can more easily see what’s going on with the ropes.
You should already know the following ties:
Prerequisites


DC① - Double Column, Tight to Pole
Safety: This technique runs strands of rope inside of the cuff ... so you will be taking space inside the cuff. This means that you need to start with a cuff that is a little more loose than normal so that it is not too tight at the end of the tie. Remember, for nerve and blood flow safety, you need to be able to slip at least two fingers inside the cuff, between the rope and the skin when the tie is complete.
If you already have a Double Column that has rope on it (someone’s already-tied ankles or wrists) and you would like to attach that DC directly to a pole, tie that Double Column with a little slack so you have some space to work with.
(You would never make the rope around the wrists of a real person as tight as it is here. I had to have it tight to keep things in place, but when tying a real person always keep safety in mind -- you always need to be able to get at least two fingers between the rope and the wrists.)
With a new piece of rope, run that broke the inside of the cuff
Then run the tail through the bight and tighten
Wrap the tail around the pole again and up through the other cuff
Bring the tail up between the pole and the DC
And around to bring all the courts together and tighten them firmly
When you are back at your starting point, split the tails
Run one on either side of the pole
And tie off with a Square Knot (on the opposite side from where busy fingers might find it)
Alternatively, if busy fingers are not an issue, you can wrap the rope and lock off with a half-hitch. You can also use a wrap like this simply to use up any remaining rope
DC② - Double Column, Tight, Extended DC
Be especially careful with this pattern. It is very easy to make the cuffs too tight if you aren't paying attention. Remember, for nerve and blood flow safety, you need to be able to slip at least two fingers inside the cuff, between the rope and the skin when the tie is complete.
You can tie wrists or ankles directly to eight pole using the Extended Lark’s Head Double Column technique.
Simply include the pole itself as you are wrapping your tail around the ropes between two separated wrists or ankles
Like this
After you have sufficient wraps, bring the tail up between the pole and the Double Column
And frap it. That is, run the ropes around the bundle of chords attaching the Double Column to the pole
When you get back to your starting point…
… Separate the strands
Run them on either side of the pole
And tie off with a Square Knot
Done!
If your partner is an eel and you want to make this even more challenging, run one chord inside of one of the cuffs and the other on the outside of the cuff and tie off with a Square Knot between their forearms, away from their fingers
If you already have an Extended DC, you can just attach it directly...
If you already have an extended Double Column and you have a bit of tail left you can do pretty much the exact same thing as the above…
Simply include the pole in some additional wraps
Like this
After you have sufficient wraps, bring the tail up between the pole and the Double Column
… Separate the strands
Run them on either side of the pole
And tie off with a Square Knot someplace away from where busy fingers could find it
Done!
DC③ - Double Column, at a Distance (Load-bearing Double Column Style)
If you already have a tied double column, and want to connect it to a pole, but can't reach the pole...
If you already have a Double Column that has rope on it (someone’s already-tied ankles or wrists) and you would like to attach that DC to a pole, but not directly to the pole, you can use the Load-bearing Double Column technique.
We will be wrapping our connecting rope around this center set of cords, not around the entire Double Column … So when you tie on this Double Column, give yourself a little extra slack to work with
So with that in mind we run our bight down one side of the Double Column cuff and up the other side
Then run the tail through the bight
Snug the Lark’s Head around those center cords
Then run the tail up to your pole
The simplest form of connection is to just tie it off with two half hitches, or a Cow Hitch and then use up / tie off the rest of your rope, but let’s use up the rest of our rope and make the connection thicker and more attractive
Bring the tail back down to the wrists, and again go between their wrists and the center cords…
Like this
And then back up through the other cuff…
… Like this
Then bring the tail up over the pole again
Now we have a few ways we can end this off, depending on if finger can reach the pole and play with the knot
Ending 1 - Wrap
If continue the rope around the pole and then begin wrapping it around the center line
Wrap it all the way back down to the cuffs
Split the tails
Run one tail inside of each cuff following this path
Like this
If this is too difficult to do, you can also run one tail on either side of the outside of the cinch instead
Tie off with a Square Knot
As you can see, it will be extremely difficult for busy fingers to get to that knot
Done
Ending 2 - Repeating Cow Hitch or Lark's Head Style
Alternatively, if fingers can’t get to the pole, you could tie it off right to the pole itself by going back around the center line…
… Then around the pole the opposite direction then around the center line, etc. repeating that a few times
When you get close to the end of the ropes….
You can either lock off with Half Hitch or two
… or …
… You can separate the strands …
… Run one on either side of the pole
And lock off the Square Knot
Like this
TC① - Triple Column, Parallel
A rapid and flexible way to tie three parallel columns together … say two ankles and a pole…
Sometimes you have three columns that you want to tie together
Like here where we want to tie two ankles to a pole
Start just as you would a Lark’s Head Double Column, positioning the secondary bight between the pole and the ankles
Make an additional wrap or two
Run the tail through the secondary bight
Run the tail between the ankles and the pole…
… All the way to the other side
Bring the tail back underneath all of the lines
Reach between the pole and the ankles from beneath (between the two bundles of ropes) and grab the tail
Pull the tail through and down
Bring the tail to the front, between the feet…
… Up across the bundle of ropes in the front…
… To the back. Hook the tail…
… And run it down between the bundle of ropes and the pole
You can now pull the tail to adjust how tight the cuffs will hold the ankles
Make the cuffs are not too tight. Remember, for nerve and blood flow safety, you need to be able to slip at least two fingers inside the cuff, between the rope and the skin when the tie is complete.
If you have more rope to use up, you can run it between the ankles again or around the bundle of ropes between the ankles and the pole, whichever works best for you
When you’re almost out of rope, split the tails and run one on one side of a bundle of ropes and one on the other side …
… then tie off with a Square Knot
Don’t forget to check and make sure that there’s plenty of slack between the skin and the ropes.
At a minimum you should be able to easily get two fingers underneath. However in this case, you may want to allow some extra space to allow your partner to adjust their position of it, but not so much is to allow them to slip out
Triple Column - Done!
Artists Corner
Artist’s Corner – Triple Column
Artist’s Corner – Triple Column
Artist’s Corner – Triple Column
Artist’s Corner – Triple Column
SC① - Single Column, Tight, Parallel, Using Wrap & Cinch Double Column (WCDC)
Tying a Single Column directly onto a frame, in parallel to the pole. This version is simple and attractive. This technique can work well if the bamboo is approximately the same size as the wrist, but does not work well if the bamboo is significantly larger or smaller.
Safety: Remember, for nerve and blood flow safety, you need to be able to slip at least two fingers inside the cuff, between the rope and the skin when the tie is complete. As you are tying to something solid, take care to provide enough space between the wrist and the pole so that the cuff is not too tight when you cinch it.
To tie a single wrist, ankle, knee, forearm, whatever tightly to a pole, use the Wrap and Cinch *Double* Column technique where the *pole* is one column. Give yourself a little extra space between the wrist and the pole
Bring the tails together and cross them into a twist
Wrap the tails in opposite direction around the bundle of ropes…
Bringing the tails to the side opposite the fingers, lock off with the Square Knot or Surgeon’s Knot
Be certain that the cuff is not too tight. As always, keep safety in mind. You need to be able to slide at least 2 fingers inside of that cuff.
Binding Done
Use up the rest of your rope, possibly by wrapping around the pole and locking off with a Half-Hitch
Done
SC② - Single Column, Tight, Parallel, Using Lark's Head Double Column (LHDC)
Tying a Single Column directly onto a frame, in parallel to the pole. This version adds a degree of control immediately, even before the tie is complete. This technique can work well if the bamboo is approximately the same size as the wrist, but does not work well if the bamboo is significantly larger or smaller.
Safety: Remember, for nerve and blood flow safety, you need to be able to slip at least two fingers inside the cuff, between the rope and the skin when the tie is complete. As you are tying to something solid, take care to provide enough space between the wrist and the pole so that the cuff is not too tight when you cinch it.
To tie a single wrist, ankle, knee, forearm, whatever tightly to a pole, use the Lark’s Head *Double* Column technique where the *pole* is one column.
Give yourself a little extra space between the pole and the wrist
Bring the tails to the secondary bight
Split the tails
Wrap the tails in opposite direction around the bundle of ropes, bringing the tails to the side opposite the fingers
Lock off with the Square Knot or Surgeon’s Knot
Use up the rest of your rope
Possibly by wrapping around the pole and locking off with a Half-Hitch
SC③ - Single Column, Tight, Parallel, Using Square Lashing
If you already have a Single Column in a cuff, you can connect that cuff directly onto a frame, in parallel to the pole. (Technique to do so perpendicular is below.)
Safety: This technique runs strands of rope inside of the cuff ... so you will be taking space inside the cuff. This means that you need to start with a cuff that is a little more loose than normal so that it is not too tight at the end of the tie. Remember, for nerve and blood flow safety, you need to be able to slip at least two fingers inside the cuff, between the rope and the skin when the tie is complete.
Make sure you have a little extra space in your Single Column to accommodate some additional ropes going through there
Run the tail over the pole…
… And through the cuff
Run the tail over the pole on the opposite side
And again through the cuff
Like this
Now that you have a loop on each side of the cuff, the binding is quite stable…
… And we just need to use up the rest of the rope and lock it off. And there are many ways to do this
In this case, I ran and the rope over the pole through the cuff one more time…
… Because I want to lock off to the pullback here far away from the fingers
Separate the tails and bring one on each side of the pole
And lock off with a Square Knot or Surgeon’s Knot
Note that the extra slack that had been in the Single Column has been consumed by the cords running through it. Double check to make sure that you can still get one or two fingers under it comfortably
Note 2: One attack on any of these kinds of bindings is to slide the knot one direction or another, depending on exactly how they are tied. If you need to lock this in place, consider using a Prusik Knot or a Klemheist Hitch (technique below)
SC④ - Single Column, Tight, Perpendicular
If you already have a Single Column in a cuff, you can connect that cuff directly onto a frame, perpendicular to the pole. (Technique to do so in parallel is above.)
Safety: This technique runs strands of rope inside of the cuff ... so you will be taking space inside the cuff. This means that you need to start with a cuff that is a little more loose than normal so that it is not too tight at the end of the tie. Remember, for nerve and blood flow safety, you need to be able to slip at least two fingers inside the cuff, between the rope and the skin when the tie is complete.
To tie a Single Column to a pole perpendicularly, make sure you have a little slack in the cuff
Run the tail around the pole and up through that slack
Like this
Do it two or three times
Then bring the rope up between the cuff and the pole …
…and around the pole again from the bottom
Run the tail underneath the loop you just made
And tighten
Use up the rest of the rope however you wish.
SC⑤ - Single Column, at a Distance, Half Hitch Connection
This is one of the simplest methods to connect a Single Column to a pole at a distance. But it is only suitable if fingers cannot reach the knots
One of the simplest methods for connecting a preexisting Single Column to a pole…
… is to just use two Half-Hitches.
Then use up the rope some how
For example, you could simply wrap around the polls and then lock off with a Half-Hitch
Alternatively, you could use the Cow Hitch concept by continuing around the pole…
Across the center line…
And continuing up around the pole protecting a little bit of the loop as you do so…
… so that it is easy to grab the tail and pull it through
Tighten and repeat if needed/desired
When you get close to the end of your rope
Lock it off with a Half-Hitch
Like this
This technique works no matter if you want the SC in parallel to the pole…
… Or perpendicular
SC⑥ - Single Column, at a Distance, Wrap Connection (v1)
This is very similar to the technique below (v2), except that I use the two Half-Hitch concept above as the starting point
If you have enough rope, you can make the connection between the Single Column and the pole thicker and more attractive by running the tail back down and threw the Single Column…
Then up around the pole.
And then begin wrapping the tail around the center line on the way back down
When you get back to the rest, separate the tail…
… and send one and through the chords of the centerline (or through the wrist cuff, see the v2 version of this technique to see that)
Now you have two separated ends
… that you can lock off with a Square Knot
In practice, you want to position that Square Knot on the opposite side of the wrist from fingers.
SC⑦ - Single Column, at a Distance, Wrap Connection (v2)
This is the way that I usually choose when doing a distance connection. This is very similar to the technique shown above (v1), except that I don’t start with two Half-Hitches and I finish off slightly differently. This just reinforces the point that there are hundreds of ways to make these connections
Start with a Single Column, and then: Run the tail up over the pole, then back down and through the cuff of the Single Column, and then back up over the pole on the other side, as shown.
Continue running the tail around the pole and then around the back of the center line
Wrap the tail around that centerline until you get back to the SC
Split the tail so that one and stays where it is and the other and continues to one more half wrap
Run the tail through the cuff
Like this
(this is just another shot to show you where the cord actually was run)
And then tie off with a Square Knot or a Surgeon’s Knot
The Square Knot should be positioned on the side opposite the fingers
Done
This technique works no matter if you would want the Single Column parallel …
… or perpendicular to the pole
J① - Connecting to a Junction (2pt)
In order to prevent my partner from being able to move this single column around on the frame (slide it up or down … or off), I want to connect it to at least two parts of the frame. In this case, I’m going to connect it across the junction, and then to this pole.
Run the tail across the junction
Run it under the junction and then up through the Single Column cuff
Run the tail around the next connection point…
… And again all through the cuff
We have now finished attaching the cuff to the frame. We now just need to use up the rest of the rope and then tie it off someplace where the fingers can’t reach it
So I just wrapped it around the joint a few more times until I got close to the end
Now lock off the ropes. You can do so with a few half hitches, or you can split the tails and wrap them around something and lock it off with a square knot
But wherever you lock them off, place them away from the fingers so they can’t be manipulated
Done
J② - Connecting to a Junction (3pt)
When connecting a Single Column to a junction, you can also make a 3-point connection. When doing this, I like to do them in order going around junction, so in this case I pick one side and…
… Wrap around that side and then up through the cuff
Then I go around the junction…
And again up through the cuff (here)…
… And then around the third point and up through the cuff a third time
Now we just need to use up the rest of the rope (which I do by wrapping around the junction a few more times)
… Until you get close to the end
In this case I am going to lock off this time by splitting the tails and running one on each side of the pole farthest away from the fingers.
I then tied those tails together using a Square Knot, which is behind this pole.
Another great place to lock this off would be with the Square Knot against the forearm on the opposite side of the cuff from the fingers
Done
You can do the same thing with a larger Single Column, for example a rope collar
In this case I would probably attached to these three points
Although in some cases you could attach to a single point here
Or inverted, I would attach to these three points
Or possibly here (although in practice, I don’t think I’ve ever done this)
A① - Klemheist Hitch - Creating an unidirectional anchor
The Klemheist Hitch is a great method for attaching a rope to a pole in such a way that it will not slide, but it only works one direction. This technique is used by many riggers to create an anchor for vertical pole suspension. This also works with both rope and flat strapping like the tubular webbing used by climbers.
Wrap your rope around tightly around the pole 3-4 times
Maintaining the tension, bring the bight down across all of the wraps
Run the tail through the bight
As long as tension is maintained, this rope will grip that pole and will not slide.
(Right now, I’m applying a great deal of tension on that tail and it’s not going anywhere)
(This technique is used by many riggers as a method to create an anchor point for vertical pole suspension)
You can use a Klemheist Hitch to create an anchor for another tie...
We can use the Klemheist Hitch as an anchor point. If we wanted to make sure that our partner could not slide their hands further away, for example, we could use this technique, then run the tail through the cuff on that hand …
… Making sure their fingers could not reach the Klemheist Hitch
We could then make this even more stable by attaching the cuff to the pole using a square lashing technique, running through the cuff
Like this
Making sure that the last row is on the side opposite the fingers
And then tying off with a Square Knot or Half-Hitch, etc
You can also create a Klemheist Hitch with a tail or working end. This can be a great way to keep a person from trying to build up slack or to work the pole free.
If you have extra tail to use up and wants to anchor it, you can use a Klemheist Hitch
Be sure you have enough space so that busy fingers cannot reach, then wrap your tail tightly around the pole 4-5 times
Like this
Separate your tails and run one of them under the incoming line
Reverse the tension so that’s that cord tightly grabs the incoming line
And then tie it to the other line with a Square Knot or Surgeon’s Knot
Done
Your partner can pull on this and it will remain locked in place
A② - Prusik Anchor - Creating an bi-directional anchor
The Prusik can be used to anchor a pole in place so it cannot slide out of place, either direction it is pulled. This can be helpful to keep your partner from sliding a pole out of position and thereby undo your hard work at keeping them contained. ;) This works wonderfully with rope that has good tooth.
Use a nice solid pole with no cracks in the section that you want to tie to.
Using a rope folded in half, wrap the bight around the pole, and then pull the tail through that bight…
… To create a Lark’s Head around the pole
Grab the bight …
And pull some of it free and continue wrapping around the pole in the same direction that it was already going
Like this
Then pull the tail through the bight again
Repeat. Again, grab the bight...
...and pull it to give you some free rope to work with, then continue wrapping around the pole in the same direction that it was already going
Like this
Then pull the tail through the bight again
Now tighten everything up using a “ratchet motion”…
Lift the tail up…
Then pull down… The knot should now be very tight, very orderly and attractive, as you see here
If it is not yet tight, do the ratchet motion again
Now, you could put tension on one direction…
…or the other, and the knot will tightly grip the pole, and will not slide
Now you can use this tail to attach the pole in place