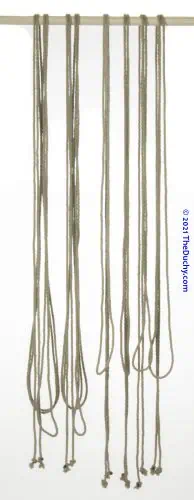
Si vous avez l'espace et l'intimité nécessaires, pensez à suspendre votre corde à une tige de goujon.
Vous ne voudrez le faire que si vous avez une tige un peu plus large afin de ne pas trop entortiller votre corde.
Pour les cordes que j'utilise tous les jours, je les accroche dans mon armoire comme ça !
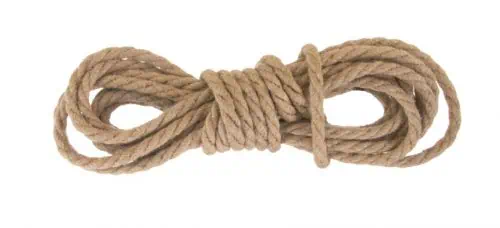
Si vous ne souhaitez pas suspendre votre corde, il est utile de la conserver en paquets pratiques, appelés "écheveaux".
L'une des façons les plus utiles de le faire est de suivre un schéma en 8. De cette manière, l'écheveau risque moins de s'emmêler.
Cette technique est idéale pour enrouler une corde en vue d'un stockage à court ou moyen terme ou d'un voyage.
Pour un stockage à long terme
Si vous comptez stocker votre corde pendant plus d'une semaine ou deux, faites encore une chose... Cela permet de protéger le nœud et c'est mieux si vous comptez stocker vos cordes plus longtemps.
Lorsque vous êtes prêt à utiliser votre corde...
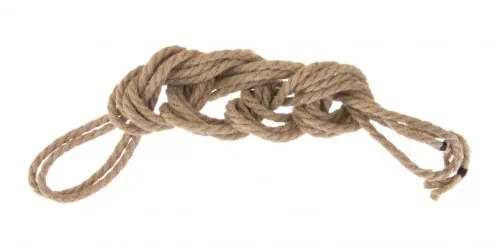
Cette approche est très stable, mais je ne l'utilise pas souvent. Si vous laissez votre corde stockée de cette manière pendant un certain temps, elle a tendance à être un peu tordue lorsqu'elle est défaite ::Pause pour la blague évidente: : Je préfère que mes cordes soient droites, donc je ne l'utilise pas pour un stockage à long terme.
Cela dit, cela peut être un bon choix lorsque vous devez laver vos cordes. Mettez-la dans un point de chaîne lâche et jetez-la dans un sac à linge. Cela permettra à l'eau et au savon d'avoir un meilleur accès que les options ci-dessus.


I’ve tried lots of ways to store rope but never loved any style I used and would sometimes not even bother properly storing them right away… Like laundry on the floor next to a hamper, so sad… I even tried some ways based on rocking climbing and various styles they use (Which are better suited to 70 and 80 meter lengths of 9-10mm ropes, unfortunately).
Finally though I discovered a way I really like and it hasn’t failed to keep the ropes put away yet because it’s just so fast, simple, and clean. So, what you do, based on your preference of starting with the tail or bite end, (I prefer starting with the bite even if it means I open my rope back up by holding the tails and throwing the bite side out and then have to “chase” is down and switch the rope around).
So hold the rope out in front of you pulling it through your hands and forming 22-24 inch long coils or bends of the rope until you have just enough rope left to do a simple coil wrap somewhere around the middle and then just pull it taunt through itself and the last wrap you make.
No need to mess with trying to make 10, 12, or 20 bends of rope only 8-10 inches long and then trying to keep them clean and wrap them up too.
I picked this up from marie.sauvage on one of her insta vids.
Oh I also like wrapping and finishing from Bite to tails too because I can flake it as I coil and it’s a little more wear on the rope where you do your storage wrap and the ends of rope aren’t where you put a lot of regular load, use, and wear and tear. Versus the bite side though where you know a lot more regular use is happening so hopefully by using the tail side to finish you are spreading that stress out.
Very cool! Thank you for sharing that with us! And good thought about the wear on the bight end, I’ll have to give that some thought…
The biggest problem I’ve had with the chain stitch is my rope ends up holding a twist/self coil after a while making tie harder during a scene.
Agreed. The only time I use that technique is when I am washing my rope. (Then I dry it under tension to make it straight again). That said, some people really like that technique.
I do like chain stitching. Clip a carabiner through all your rope bights and then hang them. 🙂
Hi, very useful stuff!
I would like to see here also a bit about washing the ropes and general rope maintenance.
Cheers