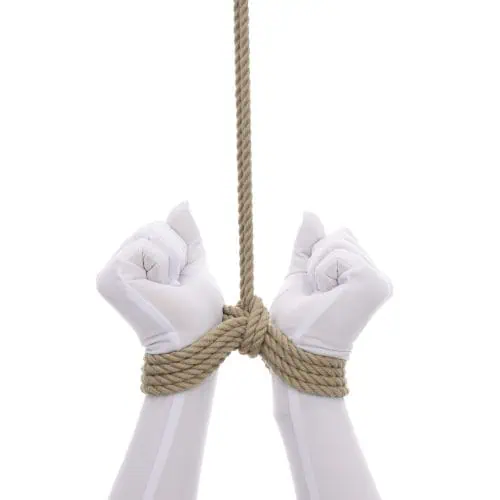
라크스 헤드 더블 컬럼의 이 간단한 변형은 빠르게 묶을 수 있으며 하중을 견디는 상황에 적합합니다. "하중을 견디는 상황"이란 사람이 결박에 대해 강하게 잡아당길 수 있는 상황을 의미합니다. 예를 들어, 사람의 손목을 헤드보드에 묶어 장면 중에 본디지를 잡아당길 수 있도록 하거나, 머리 위 단단한 지점에 묶어 팔목을 잡아당길 수 있도록 하는 것입니다. 이 기법을 사용하면 수갑을 잡아당겨도 손목이 조여지지 않습니다.
이것은 not 사람이 긴장을 완화할 수 없는 모든 상황에 충분합니다. 침대 예시에서는 사람이 단순히 당기는 것을 멈추기만 하면 긴장이 완화됩니다. 장력이 완화되면 커프의 압력이 완화됩니다. 여전히 묶여 있지만 밧줄이 더 이상 피부를 파고들지 않습니다.
하지만 머리 위 딱딱한 곳에 붙이면 더 위험할 수 있습니다. 이를 사용하여 아이의 팔을 머리 위로 올려줄 수 있지만, 너무 높이 올려서 발끝이 닿아 손목에 가해지는 압력을 완화할 수 없을 정도로 잡아당기지는 마세요. 이는 위험한 상황입니다. 아이를 발뒤꿈치에 올려놓아도 다음과 같이 주의하세요. can 시간이 지날수록 긴장을 완화하는 것이 점점 더 어려워질 수 있습니다. 항상 파트너와 명확하게 소통하고 파트너의 건강을 최우선으로 생각하세요.
Do not 이 방법이나 다른 손목 전용 로프 기술을 사용하여 누군가를 매달려고 시도하면 안 됩니다.
이 버전에는 로프를 처음 접하는 분들을 위한 모든 세부 단계가 포함되어 있습니다!
이미 익숙한 경우 종달새의 머리 이중 기둥 그리고 좋은 로프 취급를 사용하면 매우 쉽게 묶을 수 있습니다:
인라인 버전!
이 중 하나를 인라인으로 묶을 수도 있습니다. 즉, 묶는 지점 대신 로프의 구부러진 부분부터 묶을 수 있습니다.
(이는 다음과 같은 아이디어입니다. 신주가슴 아래쪽 스트랩은 라크스 헤드 더블 컬럼, 가슴 위쪽 스트랩도 라크스 헤드 더블 컬럼으로 시작만 다른 인라인 버전이지만 그 외에는 동일합니다).


Potentially dumb question but is there any reason beyond aesthetics to use the regular Larks head over this? Because unless im missing something, this just seems like it does nothing but add functionality.
The main difference here is that the wrists are a little further apart. The cuffs more completely surround the wrist, but the hands have more flexibility to move around and get into mischief. If you have anchored them so they cant reach anything, that greater freedom si not usually an issue, but there are many circumstances where that is not what you are looking to do. In those cases, the regular LHDC is a nice option.
Lazarus, this video is superb. Really nice touch going with a 1:1 ratio for the video size — inclusive for both portrait and landscape mobile screen.
This tie is a favorite for rope play with my girlfriend.
Question; When I start the tie, and I’m surrounding the bone on the wrist or am I using the wrist bone as the starting point of the tie?
Start at the fold of the wrist and build up towards the elbows in the first tutorial. This works because they aren’t really that tight on the wrists. Usually you’d tie a few fingers closer to the elbow from the bend in the wrist but as he said that would slide down under tension (bigger forearm to smaller wrist size).
Verder nice