
Dieses attraktive Gurtzeug ist einfach und schnell zu binden und kann für Aufhängungen verwendet werden, aber nur für seitliche Aufhängungen, bei denen das Gewebe nach unten zeigt, und nur dort, wo der Brustkorb gleich oder höher als die Hüften ist, wie bei einer horizontalen seitlichen Aufhängung; verwenden Sie es nicht für Umkehrungen. So haben Sie einen einzigen Verbindungspunkt, der den Druck auf das gegenüberliegende Hüftgelenk überträgt und Ihren Partner auf einem sehr starken Körperteil stützt. Mit etwas Übung können Sie diese Verbindung in etwa 2 Minuten herstellen.
Dies ist ein Teil einer Serie von gewebten Hüftgurten mit ähnlichen Eigenschaften:
- Geflochtener Hüftgurt - einseitig - verriegelt mit Halbhaken (Dieses Lernprogramm)
- Gewebtes Hüftgeschirr - einseitig - Rosette
- Gewebtes Hüftgeschirr - zweiseitig - Rosette
- Der Leto-Hüftgurt
Diese Variante ist am schnellsten zu binden, hat aber auch die geringste Reibung im Gewebe. Abhängig von bestimmten Faktoren finden manche, dass diese Variante eher an der Innenseite der Oberschenkel spannt. Wenn das bei Ihnen der Fall ist, probieren Sie die Rosette-Variante aus, um zu sehen, ob sie Ihnen besser passt.
Verwenden Sie diesen in Kombination mit einem stützenden Brustgurt wie dem Shinju, RopeFairy's Caress oder Fischergeschirr (neben vielen anderen tollen Möglichkeiten), damit Ihr Partner seitlich im Seil liegen kann. Überlegen Sie auch, ob Sie die Beine stützen können, vielleicht mit einem einfachen Somerville-Palstek oder andere Single Column über jedem Knie oder über Knie und Knöchel, oder mit etwas Detaillierterem wie einem Aufhängung Futomomo.
WICHTIG: Benutzen Sie nicht diese wenn Sie beabsichtigen, Ihren Partner bis zu einem Grad umzudrehen, bei dem sein Kopf niedriger ist als seine Hüften. Dieser Gurt bietet großen Halt, wenn die Kraft nach oben zum Kopf hin gerichtet ist und in jedem Grad dazwischen und gerade zur Seite hin. Beachten Sie jedoch, dass diese Version nicht viel bietet, um ein Herunterrutschen zu verhindern. Wenn die Kraft also nach unten gerichtet ist, besteht die Gefahr, dass das Gurtzeug über die Hüfte herunterrutscht. Wenn Sie vorhaben, Ihren Partner weiter als bis zur Horizontalen zu neigen, wählen Sie einen anderen Gurt, der fest in der Taille verankert ist, z. B. den Trommelgeschirr oder Leto Harness (Tutorial in Vorbereitung).

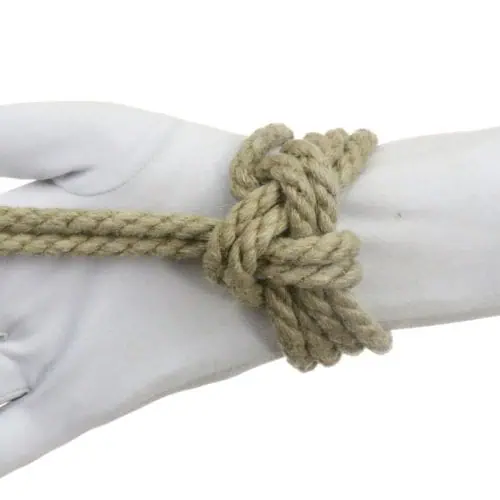
Für dieses Tutorium verwende ich ein 9m langes Stück Natürlicher 1/4″ (6mm) Hanf. Verlängere dein Seil wenn du mehr brauchst; brauche es auf, wenn du zu viel hast.
Ich verwende ein wunderbares Naturhanfseil von meinem Partner Twisted Monk. Probier sie aus!

Video-Inhalte:
- Kerntechnik (0:21)
- Demonstration des Anschlusspunktes der horizontalen Seitenaufhängung (6:31)
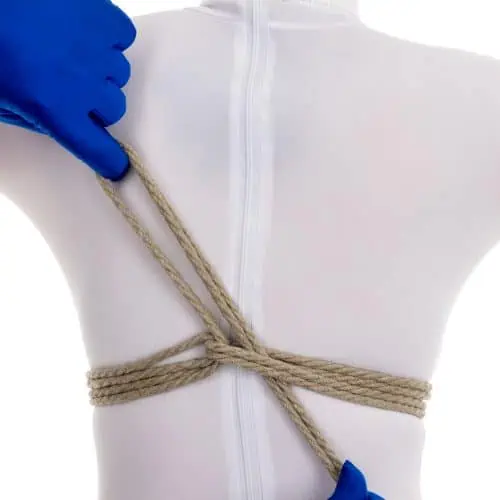
Dies ist auf der linken Seite dargestellt: Ich werde dieses Band so binden, dass sich die Einbindung auf der linken Seite meines Partners befindet. Auf diese Weise gebunden, ist es die linke Seite, die nach unten zeigt, wenn diese Krawatte für eine seitliche Aufhängung verwendet wird.
Dies geschieht auf der rechten Seite: In den folgenden Anweisungen weise ich Sie an, die rechte oder linke Hand zu benutzen. Auf diese Weise können Sie schneller und effizienter arbeiten. Wenn Sie den Knoten so knüpfen wollen, dass die Bindung auf der rechten Seite liegt, drehen Sie einfach alles um. (Das heißt: Wenn ich "rechte Hand" sage, verwenden Sie die linke usw.)
Länge des Seils: Ich habe ein 9m (30') langes Seil verwendet. Das war für diese Person mit diesem Körperbau ausreichend, um insgesamt drei Umschlingungen zu erreichen. Wenn ich eine Person mit einer anderen Statur binden würde oder wenn ich 4 Umschlingungen usw. bräuchte, würde ich eine andere Menge an Seil benötigen. Denken Sie daran, dass Sie verlängern Sie Ihr Seilwenn Sie mehr brauchen.
Hi there!
Me (a 175 cm tall & 90 kg girl with a chubby build) and my partner (a 2 m tall & 100 kg athletic guy) tied this on each other and we’re running into the harness tightening itself around the thigh in a way that would end up being unsafe. We tried it over both clothing & bare skin, with 3 wraps & with 4 and the same issue arises – when weight is put into the harness the way it’s shown on pic 39, the part around the thigh starts tightening itself and it doesn’ really stop.
Is there any way to prevent this?
There are a number of reasons this might be, but my first suspect would be friction. If the rope itself has less friction between the strands, it can more easily slide in a configuration like this. So if, for example, you are using a synthetic fiber like nylon or mfp and you are feeling this effect, you may have a different result if you switch to a natural fiber like hemp which usually has greater ‘tooth’, i.e. more friction.
If you are already using a rope like that, you can add friction during the tying process by making sure there is enough tension in the ropes that the press into the skin for about 1/3 to 1/2 their diameter, and that you maintain that level of tension throughout the tie so that the weave is consistent and you can see the rope deflect around the other ropes as they go through the weave.
But before you spend time fiddling with that, I would suggest you try a different, related tie: https://www.theduchy.com/woven-hip-harness-one-sided-rosette/
This version does the lock off on the weave itself, automatically adding more friction. Try that version and see how it feels on you. Perhaps it is better suited to your needs.
Could you elaborate a little on the reasons behind avoiding inversion with this tie? Could you suggest a safe window in which your partner can be angled?
Certainly! I have updated it with the following: Do not use this if you intend to invert your partner to any degree where their head is lower than their hips. This harness provides great support if the force is angled upward toward the head and at any degree between that and straight out to the side. But note that this version does not have much keeping if from sliding down. Therefore, if the force is pointing downward at all, you run the risk of the harness sliding down over the hip. If you plan to have your partner tipped to any further than horizontal, choose a different harness, one that anchors solidly to the waist, perhaps the Drum Harness or Leto Harness (tutorial forthcoming).
Looking forward to trying this in a suspension. Tip: I had a lot of rope to burn. Too much to just wrap around the waste band, but not enough to go around both the waste and leg again. So I went just around the waste again, weaving it down and right back up and across the back.