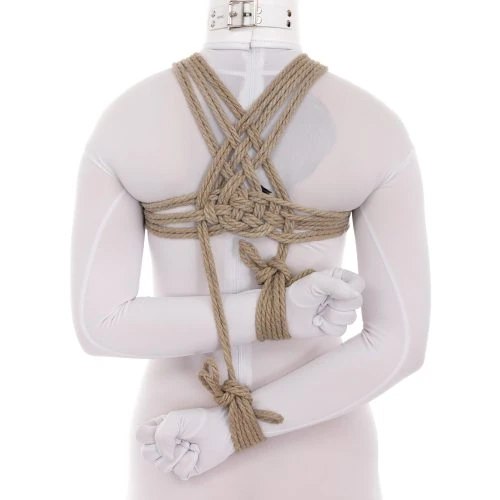
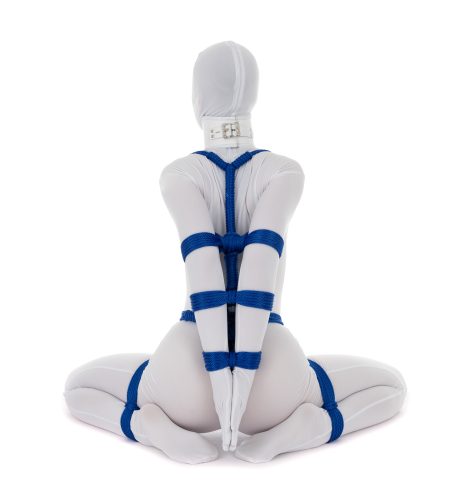
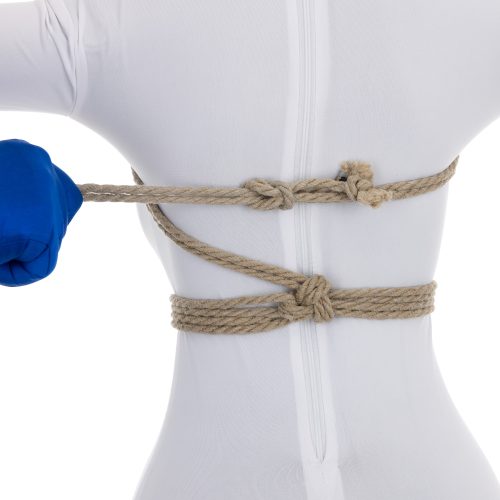
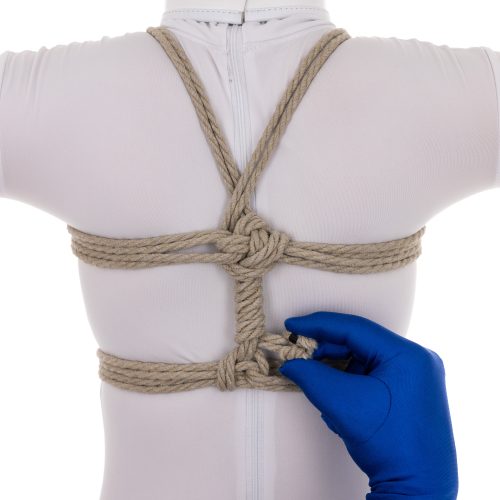
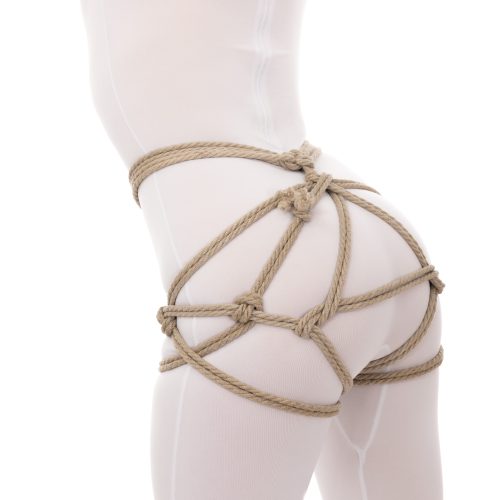
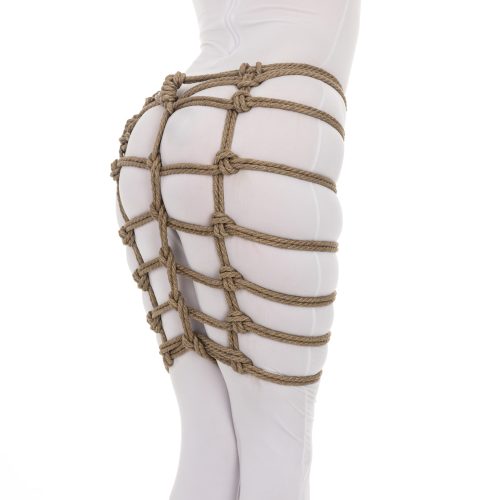
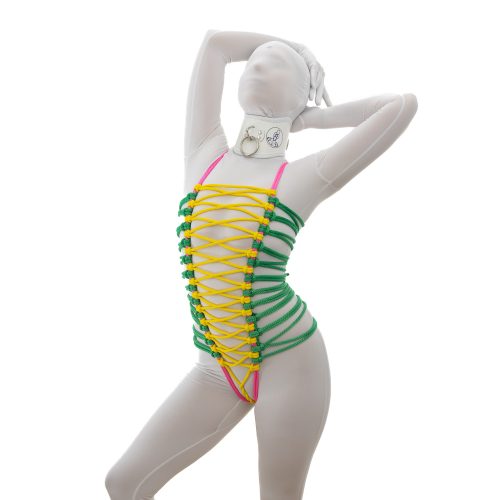
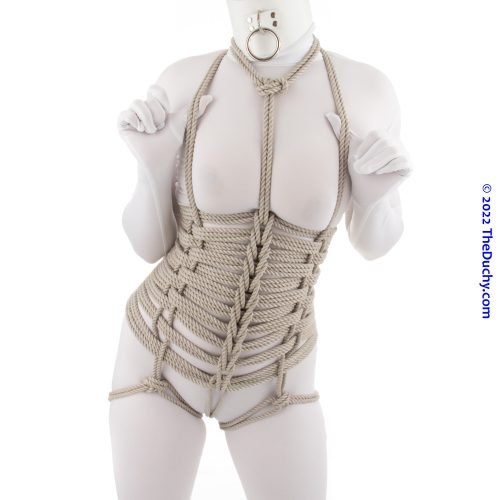
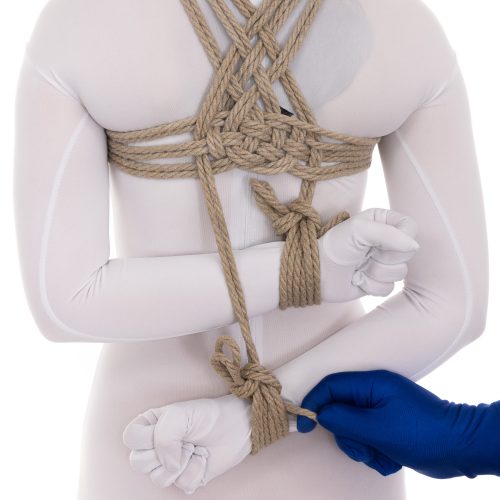
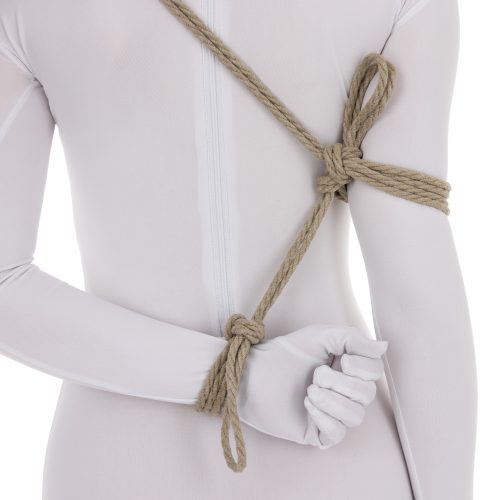
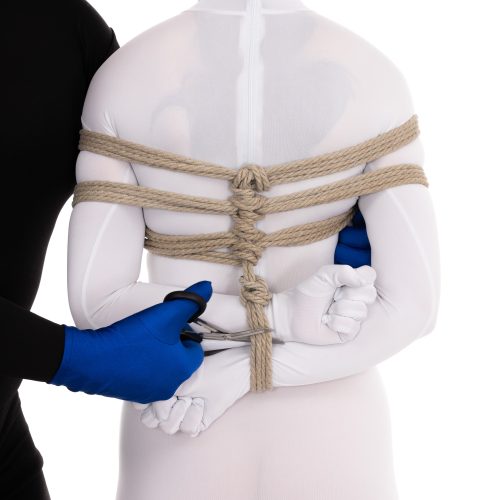
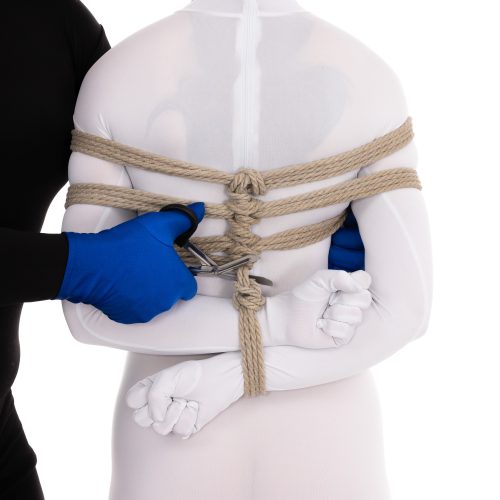
Actions speak louder than words. Demonstrate that you care for your partner by adapting your ties for their particular needs.
This article assumes you have already read through the core planning and risk management articles, including…
- Ein Rahmen für erfolgreiche BDSM-Begegnungen
- Verhandlung & Planung
- Formulare für die Absprache vor Szenen (Allgemein & mit Seilen)
- Risiken bei der Verwendung von Seilen
- Nerven und Kreislauf
- Eine Szene leiten
- Aftercare & Followup and more.
…so you should already understand how to negotiate a scene and the general kinds of questions it is important to ask. If you have not yet done so, go read these pages. Read them several times until you internalize them.
This article does not repeat that. THIS article is intended to help you smoothly and gracefully adapt your rope for a person that may need some modification to what ties you plan to use, how you tie them or with what type of rope, etc.
Every body is different. Every person needs different things.
This page is organized into two main sections:
- Common modifications: Things that are good general knowledge that you will routinely incorporate into your rope practice.
- Complications: Scenarios and situations that are less common or modification techniques that are less common. These are also worth knowing so you have the knowledge and skills to work with more people.
Video-Inhalte:
This video covers the first half of the tutorial below, the 6 main adaptation skills. It does not include information from the “Other complications” section.
- Intro – 0:07
- What this video is NOT about (and where to learn those things) – 0:24
- What this video IS about – 1:39
- An incomplete list of you need to know how to modify rope … and the fun, creative challenge of rope – 2:26
- Communication is crucial, set an accepting tone – 4:23
- 1. Actually be flexible with your plans – 6:20
- 2. Choose appropriate rope – 7:48
- 3. Adapt the rope path for body shape & type – 8:55
- 4. Reduce the pressure a rope strap is exerting on the body, if needed – 15:38
- 5. Have options to handle Limited limb mobility – 19:12
- 6. Plan ahead for immediate/rapid release – 23:04
- Wrap-up and an overview of the free material on TheDuchy – 27:28
- A quick overview of the member’s content on TheDuchy – 27:58
Riggers: These are important skills!
As a rigger or rope Top, you need to understand how to adapt or modify your plans, and to develop a few key skills – common adaptations – that allow you to be more flexible in your approach and therefore work with a greater variety of people.
Rope Bottoms: It is important you understand these things, too!
As a rope bottom, you need to understand these common adaptations as well so you can better advocate for yourself. If you know that some given common approach does not work for you, understanding these things will help you talk with your Top about adaptations that may help to improve your experience.
People … and their bodies … are endlessly complex. Here is an incomplete list of situations that may require a change or adaptation of your plans and/or approach:
- Differences in body size and shape
- Different primary and secondary sex characteristics
- Loose flesh or skin
- Low limb mobility / low flexibility
- Hypermobility
- Lack of sensation (nerve damage, etc.)
- Hypersensitivity
- Chronic Pain (SFN, MD, etc.)
- Inability to stand or sit for a long time or at all
- Inability to assume a given position (flexibility or strength issues, injury, surgery, other reasons…)
- Potential for loss of consciousness mid-scene (diabetes, narcolepsy)
- Blood conditions (low blood circulation, blood thinners, etc.)
- Breathing issues or complications (asthma, chest restriction, heavy allergy, etc…)
- Allergy to grasses
- Pregnancy
- Amputation / limb difference
- Mental conditions/differences (ADHD, ASD, OCD, Claustrophobia) **
- Trauma or neurological or mental conditions that may lead to unexpected reactions
- History of gender dysphoria
- Other situations, conditions or needs that require adaptation.
Any one of us could find ourselves in a position such as these at some point in our lives. That does not change our human needs for attention, connection, play, and excitement. So think of this as an opportunity to practice skills that could be valuable to any one of your play partners, including yourself!
People usually learn ties from a resource that demonstrates them on a person or mannequin that may be very different from your current tying partner. Because of this, some modification is almost always necessary. There are a few general techniques that will allow you to modify ties, giving you the skills to tie a wider variety of people.
By taking the time and effort to understand your partner and any specific needs they may have, you demonstrate that you care more about them than whatever vision you might have in your head. It is by our actions that we are judged, and the actions of (1) seeking to understand and then (2) adapting your plans and your ties to a person’s specific needs are part of demonstrating your integrity and care as a rigger, and as a human being.
______
** Terminology used in this article is informed by APA 7 and the DSM 5. Language and terminology surrounding medical and mental conditions is constantly changing and can be socially complex. Our intention is to respect the autonomy and humanity of a wide range of people while also being clear and descriptive.

Talking about yourself – your body and your mind, your fantasies and desires – is a very vulnerable thing to do; many people are not comfortable doing so. How you talk and the things you say is crucial in helping your partner see you as a person they can trust. This is true of both Tops and bottoms. They may be self-conscious. They may be nervous. They may fear being judged. These are all normal reactions. Help them feel accepted.
If you are a Top, your partner needs to see you as someone authentically seeking to really understand how they feel and what they need. Only by understanding a person’s specific needs will you be able to plan an interaction or scene that will be fulfilling for them and for you. Only through open conversation can you understand when one of your ideas may not work, adapt your plan and thereby avoid the awkwardness of running into an avoidable issue mid-scene. Otherwise you might trip over something unexpected and, if that issue is something your partner is self-conscious about, it can impact how they feel, potentially disrupting the whole encounter.
Some of my favorite phrases when beginning conversations like this are:
- “My plans for you are not as important to me as your mental and physical well-being.”
- “Given what we are talking about, is there anything about you that I need to know; anything that might make things go a way I might not expect or cause you to have a reaction that I might not anticipate?”
If you are a bottom, your partner needs to see you are being open and honest, someone that is willing to tell them the important things that may be relevant, even if you are uncomfortable, so that they are able to properly plan. Part of being a “safe bottom” is that you can be trusted to share such information. If you do not feel comfortable talking about relevant considerations with a potential rope Top for jeder reason, reconsider tying with them.
This page is meant to be a living document. None of us is as smart or experienced as alle of us. If you have anything to add to this conversation — information or experience with one of the situations or conditions below, or a suggestion of something we should add – please reach out and tell us!
Core adaptation and modification skills
Here is a list of common adaptations that you will routinely incorporate into rope practice that allow you to tie in a much wider variety of situations. Learn and practice these skills!
Rather than having a plan in your head from the beginning, work to understand your partner’s abilities, capabilities and needs before setting your plans … Don’t be a ‘my-way-or-the-highway’ kind of person.
This goes both ways:
As a Top, you may want to see your partner tied in a strict strappado position, but if they are unable to have their arms behind their back for a long period of time, you need to do something else.
As a bottom, you may want to be suspended, but if both you and your partner have not yet developed the skills to do that, that will be something to build up to, not something to try tonight.
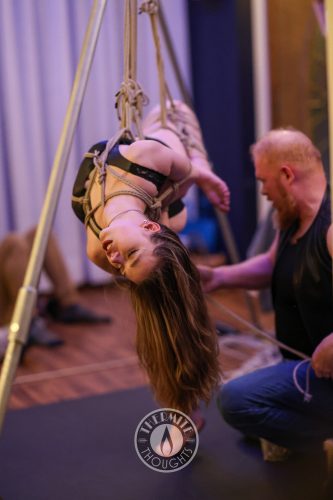
Some people are allergic to long grasses. Some have high degrees of skin sensitivity. Some have texture preferences. Talk about this and choose appropriate rope.
If someone is allergic to long grass, don’t tie them with hemp or jute…
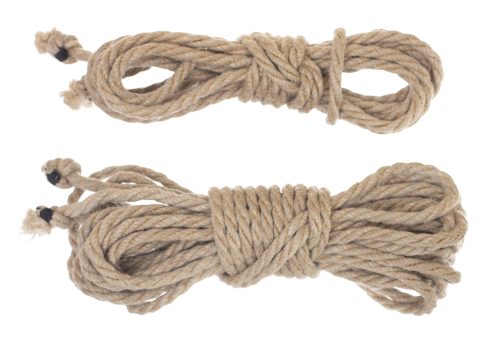
…Go with cotton or a synthetic.
If someone is severely allergic, only use synthetics that have not even been stored in the same bag as natural fibers!
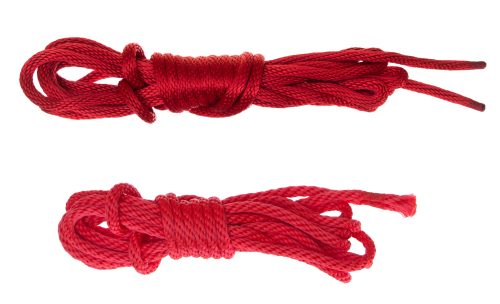
If they are sensitive to texture (perhaps because of Fibromyalgia, Autism Spectrum Disorder or other condition)…
…choose a smoother rope with fewer stray fibers.
Let them test it against their skin and decide if it will work for them.
Another thing that can help in the case of sensitive skin is tight fitting garments. Tight enough to keep the skin supported and firm enough to protect the skin from the rope and not snag the rigger’s finger’s while tying.
Make your rope fit the person you are tying. This is one of the great, creative challenges of rope, that it is infinitely variable … allowing you to adapt it to the infinite variation of bodies out there! This includes:
- Different body shapes, sizes & proportions
- Different geometric shapes that you might want to enhance or minimize
- Curves or a nice X or V shape
- Different primary and secondary sex characteristics:
- They may have penises or vulvas or neither or both,
- They may have breasts or no breasts or large breasts
As the great UK-based rope educator, Esinem, says: “Tie PEOPLE, not parcels”
Different body shapes, sizes & proportions
Different bodies require a different amount of rope for the same tie. No matter who you are tying on, there are only two lengths of rope: Too short and too long. Be sure you know how to Extend Rope if needed, and various ways to Use Up Extra Rope.
If you need to extend your rope, just do it; don’t comment on it. If a person does not know that adding rope is a normal and expected part of tying, they may hear “hang on, I need to get more rope” as a form of size-shaming. This is usually less of an issue with an experienced rope bottom, but a comment like this in front of someone new or someone that is sensitive about their size can be emotionally devastating.
Different geometric shapes you may want to enhance or minimize
Whether it be curves, a ‘V’ shape or ‘X’ shape, rope can be used to enhance features a person likes and to minimize attention on those they may be less confident about. The key is to run that rope along paths or in shapes that have those effects. Techniques like this that allow you to highlight and minimize shapes are generally useful skills; they can also be particularly helpful if working with a trans person to enhance those aspects of themselves that they wish enhanced.
Body Shape – Curves:
Take advantage of rope’s ability to flow. Use it to enhance those curves. There are many ties for waist, hips and chest.
If a person has a wonderful curve to their hips and butt, a Pfirsich-Krawatte can enhance that.
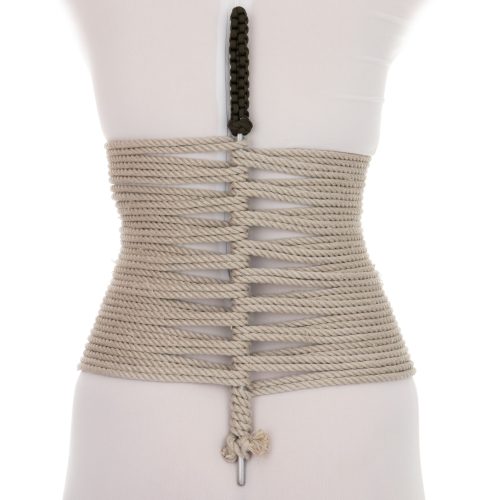
You can explore Rope Corsets oder Mathildas Umarmung to create or enhance an hourglass shape. These can go on any body type and feel amazing. If trying corsets for the first time, start with the Quick-Release version because it is much faster to tie and it will give you practice keeping your tensions even.
If your partner has breasts, explore ties to enhance or constrain them. More on this below.
Body Shape – ‘V’:
You are tying on a male-presenting body, or tying a person that wants to enhance elements of themselves that lean into that look. If adding a chest harness you would want to minimize the degree to which it looks bra-like, running the lines in such a way as to minimize that effect.
You can choose a chest harness that follows different lines altogether, like the Bulldoggengeschirr.
You could also go with RopeFairy's Caress or other chest harness and choose where to run the straps to enhance the shape you want. For example: With one strap around the soft waist, one a slightly larger one a little higher than that, and the largest strap around the chest just above its widest point.
Body Shape – ‘X’:
You can enhance an X shape in several ways:
Breasts – No breasts or to minimize/reduce breasts
Even if a tie seems to have been designed for a person with breasts, it can be adapted for someone with no breasts or small breasts.
Think about rope as needing to be anchored to a person’s underlying skeletal structure. If you do that, it usually doesn’t matter if they have breasts or not, unless you are going for a specific look.
The lines of most main load-bearing straps of a classic chest harness go in the same place: Across the upper chest, over the upper part of the sternum and across the mid-chest, over the lower part of the sternum.
If the person has breasts, you navigate around/under them.
If they do not, you can make the harness less bra-like by running the horizontal straps of a chest harness closer together and straight across the chest. Also, arrange any vertical support lines so they keep those horizontal straps straight and do not deflect them up or down. You can also run those vertical support straps directly across the pectorals if you do not need to navigate around breasts or if you want to minimize them.
Breasts – Enhancing small breasts or to give someone breasts
You can use the vertical element of a chest harness to squeeze the breasts or the flesh of the chest to give it a larger, more bulgy appearance … no matter what they had to start with. You can also lift them higher on the chest, if desired.
You can also use various BH approaches to enhance the chest area in a way that highlights breasts or gives the appearance of breasts even if they are not present.
Breasts – Large breasts
Be sure to place rope straps in the proper spot. Remember, you want to tie to the underlying skeletal structure. If doing a chest harness that has a strap that runs across the lower chest, you want that strap just under where the breasts meet the chest. If your partner has large breasts, this usually means going underneath them. Negotiate how this will be done. You can do so without touching the breasts, by putting rope lower then working it upward under the breast while sliding it across the skin. Or they could lift them out of the way, or – with their prior consent – you can do so.
You can highlight large breasts with breast-focused ties like those in the BH tutorial. The Cinch & Wickeln oder Cross-Your-Heart chest harnesses are also great for this, or as a base that will then allow you to “Cupcake” your partner’s breasts.
Plan for where they will be. If you are planning an arms-in harness that will compress the breasts, like the Fischergeschirr for example, experiment with your partner to figure out where their breasts will be the most comfortable.
Larger breasts may require support in ways that the standard form of your chosen chest harness does not provide. Many chest harnesses have a strap above and below the breasts and then add a vertical line in between the breasts for decoration or to compress and/or uplift breast tissue. In such cases, larger breasts tend to flow out to the sides unless you add vertical support straps on the outside as well to constrain them. See the BH tutorial for tips on how to modify a chest harness to add support in various places. The LUIO variant of the Bra Frame shows ideas that may be helpful when framing large breasts.
Penis – Adapting a crotch rope element to accommodate a penis or add a dildo
If a harness does not have a crotch rope element – a line running right through the middle between the legs from front to back, so as to interact with whatever is between them – it likely needs little to no modification.
If it does have one, it is easy to modify to accommodate a penis or dildo. Here are two simple ways:
Simply separate the lines of your tail and then run one on each side of the penis or dildo, keeping them against the body at the base of the penis, not running over the balls.
- Optional: You can decide if you want to add a knot above or below that point. These optional elements increase the pressure on the base of the penis or dildo, increasing the sensation in the case of a penis or providing a more secure hold in the case of a dildo.
Alternatively, you can run the tail both forward and back, each time running on a different side of the penis or dildo:
It is important to manage the amount of pressure rope places on the body.
This modification can be helpful when tying someone with:
- Softer flesh
- A larger body size
- Skin that is more sensitive to pressure
- …or just because of personal preference.
Managing force starts with how tight the ropes are when you tie them. The tighter the ropes, the greater the force on the skin and the higher the pressure.
Ensuring you can get two fingers between the rope and the skin will, for most people, usually result in straps that are not too tight. But what if that isn’t enough to make the tie sustainable for your partner? “Too much pressure” is highly subjective and will be different for different people and parts of the body.
Additionally, even if the rope feels fine to them when you tie it, it is still possible for the pressure of that rope to change. If your partner changes position after being tied or if you anchor the rope to some other object (in a suspension or not in a suspension), rope that previously felt fine might become uncomfortably or even dangerously tight. This is why we advise that you put someone in the general position they will be in vor you tie them, and continue to check in throughout the rope scene.
When Tension and/or Force increases, Risk of Injury increases.
No matter the reason, if the tension of (or on) the ropes increases, the risk of injury also increases. As the tension, pressure, and force increase; the ropes will dig more deeply into a person’s skin and press more firmly onto what is beneath – nerves, blood vessels, muscles and bone – increasing the risk of damage.
When a person’s flesh is softer, rope at a given level of pressure will press more deeply into them. This means that muscles, nerves and veins can be moved further relative to each other. Meaning the risk of nerve damage by shearing forces or by stretching that nerve too far, is greater.
Es gibt eine einzige Lösung, die in jedem dieser Fälle helfen kann: Breitere Gurte anfertigen. Spread the force over a wider area. This reduces the force on the skin and its impact on things under the skin. Remember the formula from Physics: Pressure = Force/Area, P = F/A
Hier sind zwei gängige Möglichkeiten, dies zu tun:
Breitere Bänder durch Verwendung dickerer Seile herstellen
Wenn alles andere gleich bleibt, bedeutet ein dickeres Seil breitere Gurte.
Quetschgefahr
Der Abstand zwischen den Seilsträngen ist größer, wenn die Seilstränge selbst größer sind. Manche Menschen finden, dass es leichter ist, ihre Haut zwischen den Litzen einzuklemmen, wenn diese Litzen größer sind.
Breitere Bänder mit mehr Strängen herstellen
Durch das Hinzufügen weiterer Umschlingungen wird auch der Gurt breiter. Dem sind jedoch Grenzen gesetzt. Wenn Sie zu viele Umwicklungen hinzufügen, kann sich das Band am Knoten zu sehr zusammenziehen und es ist schwierig, alle Litzen parallel und mit der gleichen Spannung an den Stellen zu halten, an denen das Seil Druck auf die Haut ausübt. In der Regel sind 3 oder 4 Umschlingungen für insgesamt 6 oder 8 Stränge möglich, mehr kann mehr Arbeit bedeuten.
Für noch breitere Bänder, machen Sie beides!
Sie können auch beides kombinieren und ein größeres Seil verwenden. und mehr Wraps.
Don’t assume!
Don’t assume that a large person wants wider straps. “Oh that person is bigger, they will require more wraps” is not the way to think. They will require more rope just because of geometry, but they may prefer the standard 4-strand strap and not the 6-strand one. Every body is different. Every person is different. What works best for any person is unique to them.
Eine weitere hilfreiche Lösung: Machen Sie mehr Bänder!
Eine andere Möglichkeit, die Kraft auf eine größere Fläche zu verteilen, besteht darin, ganz neue Gurte hinzuzufügen.
Dies gilt vor allem dann, wenn mehrere Techniken miteinander kombiniert werden oder wenn fortgeschrittene Bindungen durchgeführt werden.
Regardless of what you try, continue to tie well!
Regardless of what you do to address this issue, be sure to continue to tie well. Make sure all the strands of your strap have the same tension. A strap of rope is only as wide as the tightest strand. So to actually distribute the force over a larger area, all the strands need to be the same tension.
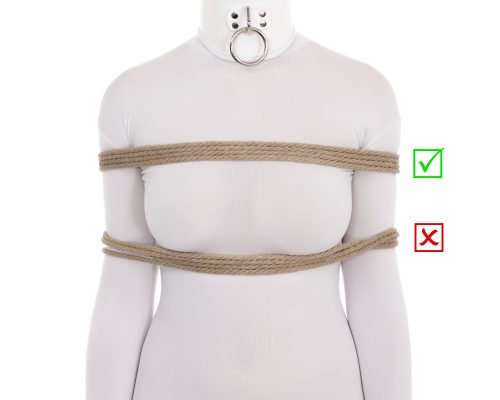
Different people have different degrees of limb mobility or flexibility. These differences can stem from genetics, level of physical training, individual body mechanics, injury, surgery, pregnancy, EDS and many other sources. Asymmetric limb mobility, where the flexibility in one limb is different from another, is also common.
Ways to mitigate:
Don’t scene cold; warm up and stretch – If attempting a position that pushes the boundaries of a person’s normal flexibility, always warm up and do some light stretches first.
BE CAREFUL. Go slowly. Give the bottom a safety margin – Never force them past the edge of their flexibility, and don’t tie them too close to the limit of their flexibility. If you do, a simple accident or moment of inattention could push them past that limit, which can result in serious injury. Learn their limits and then back the tie off from those limits a little, so that you have a safety margin.
Choose ties that do not require a person to challenge the limits of their flexibility.
Once you have checked body mechanics, if there are still issues, you could simply choose an entirely different position. A tie that does not put your partner into a position that is challenging for them.
Example: A person is unable to put their shoulders back or to both their arms behind their back; or if they quickly start experiencing numbness, tingling or other strange sensations when they do so. In a case like this, choose a ties that bind their arms in a different position altogether:
- Behind, but more to the sides: Erweiterte Lerchenkopf-Doppelsäule, Leichtes Ellbogengeschirr or both … or a Sleeves-style Armbinder.
- To their sides directly (e.g. Double Column, Libelle Kabelbaum, Schlafsack, Pinguin-Ritzel)
- In front of them (e.g. Zwangsjacke, Fischergeschirr, Stuhl Krawatten)
- Above their head (e.g. Tragende Doppelsäule, Häschen-Krawatten)
Ensure they are using good body mechanics. If a person has never been shown how to position themselves, they may actually have more range of motion than they believe.
Choose ties that allow for greater ability to adjust to your partner’s needs.
Example: You both want to experiment with a box tie, but while your partner is able to easily put one arm behind their back, the other can only go part way.
Instead of using one Single Column around both wrists (as this would not be possible), you can put a single Column around each wrist individually, allowing you to anchor them into a chest harness without having to be together; each can be bound to a degree that is comfortable to it specifically.
Employ physical therapy techniques to improve mobility, if desired.
If you and your bottom want to do a position that they are not currently able to comfortably maintain, physical therapy techniques may help in some cases.
Talk to a Physical Therapist or do some research online to see if they can help. Here are some helpful search terms:
- “Nerve gliding physical therapy” (For arms: ulnar, radial, Median)
- “Shoulder inward rotation ROM physical therapy” (ROM or “Range of Motion”)
- “Hip flexor ROM physical therapy”
- “Ankle mobility physical therapy”
- “Mobility yoga”
One of the first rules for managing risk when using rope is to have a way to quickly remove the rope, if needed.
There are many reasons for this:
- Nerve compression or damage
- Low blood circulation
- Loss of consciousness
- Muscle cramping
- Mental conditions such as:
- ADHD
- Autism Spectrum Disorder
- Klaustrophobie
- Panic Disorder
- More…
EMT-Schere
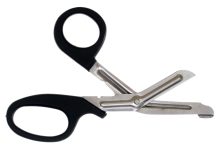
So it is important to always have a way to cut the rope when tying:
That said, it is almost always better to plan ahead and have a way to quickly untie them or to relieve the tension ohne having to cut rope if you can. The key to controlling rope is maintaining tension. When you cut the rope, that tension vanishes; both the rope and your partner can move in unpredictable ways. If you can alleviate the issue very quickly without having to cut the ropes, things tend to stay more controlled and can be de-escalated very quickly, sometimes even more quickly and with lower risk than cutting the rope.
Ways to mitigate
Use Quick Release ties:
Die Verrutschte Somerville Bowline is a Single Column that allows you to untie it in 2-3 seconds. This is wonderful for Box Ties as it gives you a way to release your partner’s wrists, thereby allowing them to adjust their position and rotate their arm so that their radial nerve is no longer being compressed. This technique is faster than most people could use scissors!
Die Schnellspanner Hojo-Manschette is an inline Single Column that allows you to very quickly release tension on that cuff if needed. It is not a full release like the Slipped Somerville Bowline, but it relieves the tension quite a bit, helping to de-escalate the situation and allowing you time to untie normally.
Die Emergency Munter Hitch, used either above a suspension ring or as your suspension friction itself, will allow you to get your partner down on the floor in just a few seconds. I use this for every suspension I do, even partial suspensions. If my partner has an issue, I can quickly and gently get them down, removing gravity as a force of concern, and then take further steps to address the issues if any remain. (Often just getting them on the floor is enough to fix the issue.)
But if you run into an emergency situation and have not employed one of these techniques, don’t hesitate to (1) support your partner, then (2) cut the rope if needed. Your partner and the trust between you is much more important than a piece of rope.
Other complications and ways to address them
There are other situations and scenarios which can be helped by modifying what you tie, how you tie it or with what.
Situations when this may occur:
- Lack of experience tying / rigging
- Soft body or soft body parts
- Large body size
- Loose flesh or skin
Ways to mitigate:
This is discussed in much more detail above in the “4. Reduce the pressure…” section, but:
- Don’t tie too tightly. You should be able to get two fingers under the strap of rope.
- Tie well. Ensure all strands in a band are parallel and have the same level of tension – A band is only as wide as its tightest strand.
- Make sure the bands are tight enough to remain stable or are supported in some other way – A band that is too loose or is unsupported may shift when your partner moves or it is put under tension, deforming the strap and allowing lines to fall out of order, making the strap less effective. This is particularly true in areas of the body that change shape or size significantly when a person moves, like the upper thighs for example.
- Lock off each band as you create it to help it remain stable and keep the lines at that same level of tension (like is shown in the Shinju tutorial as compared to the Bikini-Brustgurt).
- Place bands in areas that are more firm, if possible.
- Add more wraps or use larger-diameter rope to make wider straps, thus distributing force over a larger area. (See above for two techniques.)
- Run your fingers under each strap as you complete it to ensure no skin is caught between any strands of rope. Do so again when the entire tie is complete, before you put additional tension on any of the lines.
These issues have the same common mitigations as the section above.
Situations when this may occur:
- Personal preference
- Nerve damage due to burn injury, impingement, etc.
- Mental conditions such as ADHD and Autism Spectrum Disorder
- Conditions such as Fibromyalgia, Small Fiber Neuropathie, Dermatomyositis, etc.
Ways to mitigate:
- Let them choose from available rope options. Sometimes simply using a rope that has fewer loose fibers can address this issue. Synthetics like nylon or MFP are typically much smoother than natural fibers like hemp, jute or even cotton. Let them hold the rope and move it against their skin and give you feedback.
- Wearing protective clothing such as leggings or a tight shirt over the area of concern.
- Pad the area of concern (e.g. cover a sensitive burn scar with soft cloth or other cushioning material).
- Consider reducing other forms of sensory input such as light or noise, which may contribute to sensory overload (blindfold, earplugs or headphones with noise cancelling capabilities, turning down music or lights)
Situations when this may occur:
- Nerve impingement
- Neuropathy
- Injury
Ways to mitigate:
- When a person has lower sensation, they need to do tests more consciously and conscientiously.
Make sure that your partner:- Understands how to conduct nerve tests (both motor and sensory),
- that they do so immediately prior to the scene so that they have a baseline for that day,
- that they conduct these tests periodically throughout the scene, and
- that they know to inform you sofort if they detect a change or issue.
- Use caution when placing strain on the part of the body that may be impacted. Your partner may not be able to tell if something is wrong. If you choose to do so, discuss the approach you will use and its risks. Monitor frequently.
- Leverage quick-release techniques so they are in place if needed
Situations when this may occur:
- Rope is too tight around the abdomen or chest, particularly if it is on both at the same time.
- Body position is such that it restricts normal breathing. This is also called ‘positional asphyxia’.
- Pregnancy
- Asthma
- Mental conditions such as Anxiety or Panic Disorder
- Upper respiratory illness (cold, flu, covid-19, etc.)
Ways to mitigate:
- Monitor closely for signs of breathing distress, or difficulty speaking.
- Do not combine a tight chest harness with a waist or hip harness that applies excessive pressure across the abdomen. Make sure at least one of the two is loose enough to allow comfortable breathing.
- Reduce pressure on the front of the body (e.g. If doing a Hog Tie, lay your partner on a soft surface or on their side, perhaps supported by pillows)
Situations when this may occur:
- Hypermobility – Joints that move beyond the normal range of motion, potentially leading to joint instability and increased risk of injury.
- Ehlers-Danlos Syndromes (EDS) often includes hypermobility as a symptom.
Issues:
The primary issue here is that you cannot rely on a person’s body to limit their movement or range of motion the way you would in other circumstances. They may be able to make themselves move in a way that causes many standard ties to no longer be stable, allowing them to escape. They may be able to shrug out of a box tie, for example. … But moving beyond the normal ranges of motion increases the risk of injury, even when the person is moving like that under their own muscle power.
Due to this, it can be tempting to try to tie them tighter. But tighter isn’t the answer because (1) the issue is the extended range of motion, and tightening things often doesn’t address that, and (2) making rope too tight brings higher risk of compression injuries, etc.
Ways to mitigate:
- The rigger must limit the range of motion to safe ranges using rope or other gear rather than relying on the limitations of the body. (Use more rope and attach it to more anchor points!)
- This is perhaps best explained with an example: I knew someone that was so flexible that even with their elbows and wrist tied tightly together behind their back, they were able to reach around their body and smoke a cigarette! But doing so put them at severe risk of dislocating their shoulder (which they had done to themselves several times over the course of their life). To keep such a person controlled and away from the danger zones, their partner routinely not only tied their wrists together, but also to something else behind their back to keep them anchored in place. For example, tying their wrists to the back of a waist harness,to their ankles (hog tie), or to a spreader bar. In this way the rigger was able to limit this person to a safer range of motion.
- Also, consider the ties you use and the order that you tie things. Some ties require the bottom to hold a joint in a position that may be prone to hyperextension, dislocation, or pain while the Top is tying something else. (Classic hog ties are a good example of this; the shoulders are back and not supported for an extended period of time while the Top ties the ankles.) Choose ties that provide better joint support, and plan your order of tying so as to minimize the amount of time that sensitive joints are placed into higher-risk positions without support.
- For example, instead of using a Klassische Schweinekrawatte (which places all the strain on the shoulder joints), take a different approach:
- First tie your partner’s arms with a supportive box tie (e.g. Gote Shibari) or a supportive armbinder (e.g. Schweres Ellbogengeschirr). Both of these options have straps of rope holding the upper arms and shoulders firmly against the torso, providing extra support.
- Then tie the legs however you wish. Perhaps with a simple Double Column at the ankles or separately with a Frog Tie.
- Then instead of connecting the legs to the wrists, connect them to straps of the chest harness.
- You can see an example of this in the second section of the Accessible Hog Tie tutorial where we show an example using the Heavy Elbow Harness and a Frog Tie.
- For example, instead of using a Klassische Schweinekrawatte (which places all the strain on the shoulder joints), take a different approach:
Situations when this may occur:
- Diabetes
- Low blood pressure
- Vagal nerve stimulation
- Narcolepsy
- Various other chronic illnesses
Ways to mitigate:
- Talk about this with them in detail. Determine if loss of consciousness is random or is triggered by specific situations. This helps you assess if you are comfortable in handling that situation should it arise. It also helps you plan ahead to avoid potential triggers during a scene if you choose to tie with them.
- Determine if you are willing and able to tie with them in a way that fits within both of your risk profiles.
- If you do not feel that you have the skill or experience to safely handle the situation, don’t tie with them.
- If you choose this path, make sure to take responsibility for that choice. This is Ihr limitation in skill or experience. This is not their fault, don’t make them feel bad about it.
- If you choose to tie with them, plan ahead to better manage risk:
- If there is something they need to do to avoid the issue, have them do so before the scene. E.g. Confirm they have taken their medication as prescribed that day, eaten something before playing, etc.
- Consider asking for support from another rigger, caregiver, friend, or spotter. Ensure that everyone involved in the scene is present during the negotiation and understands what is expected of them should things go awry.
- Ask the rope bottom what response they need from you if they start to fall unconscious or fully lose consciousness.
If they are tied, they cannot act to help themselves as they normally would; therefore, you are responsible for acting and getting them the required care. This is one of the key responsibilities of power exchange.- For example, if a diabetic starts to go low and feels they may lose consciousness, they need sugar. Have some apple juice, a regular Coke, or glucose tablets within easy reach so you can give them to your partner, if needed. Ensure they are in a physical position where they can drink without choking.
- Have a fully charged phone on your person or within reach. Know the number for emergency services in your area (e.g. 911 in the U.S., but other numbers in other places).
- Tie on a padded or cushioned location.
- Choose ties and positions that are seated, laying down or otherwise supported in such a way that they will not fall or can only slump a few inches if they lose consciousness.
- Tie far enough away from any hard object that they cannot accidentally hit anything if they fall or tip over.
- Choose ties that can be swiftly and easily released. Keep in mind that an unconscious person cannot help you, even by holding their own body weight.
- Double check that you have your emergency rope-cutting tool on your person or within easy reach.
While gender dysphoria is not always present, many transgender people (trans women, trans men, nonbinary people, agender people, etc.) experience a sense of incongruence between their physical appearance and internal sense of self. If you are tying with a trans person or someone with a history of gender dysphoria, ask them about their preferences and limits specifically regarding potentially gendered language and physical features.
Some prefer not to engage with primary or secondary sex characteristics that are not in alignment with their identity. Understanding how to emphasize or de-emphasize various body parts and shapes can make a universe of difference to such a person, allowing them to enjoy the time with you.
Ways to mitigate:
- This can be an area of deep sensitivity. Be open and welcoming in how you talk.
- Discuss areas of the body which, if highlighted in a particular way (or at all), would trigger feelings of gender dysphoria.
- See above for ideas on how to adjust your plans based on what you learn.
- Appropriate compression garments may be helpful as well.
This is a huge, highly nuanced topic. It is deeply personal and is different for every person. The best general advice is to invest time and effort into learning about the specific “tells” and triggers of your rope partner. Figuring out what might help if things are starting to go off the rails. Demonstrate your care for them as a person – the whole, wonderful person that they are. Then leverage the ideas throughout this article to help.
This was provided by one of our members during a discussion on this topic in our Discord community:
There are many different conditions that can make things can go from “This is great!” to “This is BAD” very quickly for us because our interoception often isn’t as great as we’d like it to be. Either we missed a signal that things were going bad with our body/brain, or we get a false alarm and it triggers us. But at the same time, completely stopping a scene because of that sudden shift can also cause a lot of distress (“I can’t even engage in this sort of play.” / “Why does this happen to me?” / “It was going so well and we had to stop because of me.”, etc, etc)
The solution to dealing with this is going to vary greatly and be very individualized, but something I’ve found is working pressure relief knots into certain spots. Where I make a loop and put a short piece of dowel through it. So if my partner shifts mood suddenly, instead of cutting or completely undoing a tie, I pop the dowel out and the tie suddenly has some slack. (Obviously this does not work for all ties.) But that change in sensation can sometimes be enough to reset the freak out, and if it’s not, taking that step to double check that we really do need to end a scene helps mitigate the bummed out feeling afterwards.
Other than that, really, really, really knowing a partner’s triggers and comforts and having them at the ready is a must, and a lot of times they might be things instead of just “blanket” or cuddling because our neurodivergent brain decided it needed sunlight or protein or something…
-M
A person with claustrophobia that wants to be tied, usually can be. It just takes some time to build the necessary trust and confidence.
- Talk to them about what it looks like when they are starting feeling the effects of their claustrophobia … and what they want you to do. Do they want you to release them immediately or help them experience it for a short time first?
- Build trust by going very slowly and letting them guide you.
- Demonstrate quick-release ties like the Verrutschte Somerville Bowline, first on yourself or another person Show them how quickly it can be released, if needed.
- Then try it with them, but only on one part of their body. Ask them where it will be least likely to trigger a panic response. Perhaps a wrist is too much, but an ankle or knee would work. Tie it on, but not too tight, and just let them feel the rope itself, do not pull or jerk on it the first time. Then release them, again demonstrating and practicing that quick release with them so they experience how quickly they can get out, if needed.
- If they are feeling comfortable you can try again, this time gently pulling the tail of the completed cuff so they feel a bit of that pressure. Again, fully release them and give them time to reset and confirm they are still grounded and comfortable.
- Then ask if they want to try two things tied together, and, if so, which? Perhaps their knees, ankles, wrists…
- Continue building from there. One small step at a time, each time releasing and letting them reset.
- Continue talking and let them guide you.
- Once you have built to a point that they feel able to try something more restrictive, again talk them through the various techniques you have to release them quickly.
- Establishing an agreed set of signals that they are starting to feel the claustrophobia so you can release them before panic sets in.
- Perhaps just use the Green, Yellow, Red system, being clear about what each color will mean:
- Yellow might mean you stop and check in on them to decide if they need to be released or just need things to pause for a moment until they feel calm.
- Red might mean that panic is imminent and they need to be released immediately.
Situations when this may occur:
There are many situations that may result in chronic pain.
- Injury
- Fibromyalgia
- MS (Multiple Sclerosis)
- many others…
Ways to mitigate:
- Discuss this with your partner. Learn what triggers their pain and how they normally deal with it when it flares up.
- Create a plan to avoid triggering the pain, if possible. This may include:
- Choice of physical orientation and bodily position (Standing, sitting, laying down on their back or side, etc.)
- Type or texture of rope (See “2. Choose appropriate rope” above)
- Specific ties and the body positions the person will be tied in to (See “5. … limited limb mobility” above)
- Have appropriate medications or other measures in place to help in case of a flare-up.
- Use quick release techniques (“6. Plan ahead for immediate/rapid release” above) to allow you to more rapidly respond to an issue, if necessary.
Situations when this may occur:
- Chronic pain
- Injury
- Pregnancy
- Amputation
Ways to mitigate:
- Plan a scene that does not require standing for a long time, or at all.
- Let them sit or lay down! There are plenty of binding options for those positions.
- If they are in a wheelchair, you can turn it into a bondage wheelchair!
- If you both specifically want to do a scene that will require a position difficult for them to maintain – perhaps having their hands tied to an overhead hard point for a flogging scene, or some form of partial suspension – plan ways to support them or to get them down quickly and safely if needed.
- Perhaps a cushioned platform (massage table, etc) nearby that is easily moved underneath the rope bottom.
- In the event that the bottom feels unable to stand safely when being untied, have another person or sturdy object to support their weight while the remaining rope is untied.
- BE SURE THEY KNOW NOT TO PUSH THINGS TO THE POINT WHERE THEIR STRENGTH MAY FAIL! Serious injuries can happen quickly when a person falls. If they feel they are getting close to their limits, they need to tell you so you have enough time to get them safely down.
- If you are performing a suspension (partial or full) consider these additional elements:
- Use the Emergency Suspension Munter Hitch above your suspension ring to allow an easy transition to the floor where the rope can be untied without requiring the bottom to support their own weight.
- Engage a trustworthy person to act as an additional spotter during the scene. Give them clear instructions about how they should respond if you need them (e.g., “If I signal you for help, immediately move to support her head and shoulders. I will release the emergency munter hitch and begin lowering her down. Protect her head the entire way down and I’ll tell you if I need any other help afterwards”).
A person with an amputation is still a person with all the needs, interests and desires that drive everyone else. They still need connection, excitement and exploration in their lives. Society often sees such people as no longer having those drives; but they do! Let’s do better!
It is true that many ties are symmetrical and assume that the person being tied has two wrists, ankles, arms, legs, etc. But many of the same modification skills discussed throughout this article can be employed here just as well!
Ways to mitigate:
As with anything, if you do not understand it, make the effort on your own time to educate yourself on the topic and learn the social etiquette of interacting with individuals with amputations. If a situation comes up and you do not yet know the specific etiquette, start with being respectful, and acknowledge that you may make a mistake. It’s okay to be nervous about saying or doing something obtuse. Take a few deep breaths and remember that they are a human being with all of the needs, desires, and interests that drive everyone else. Follow their lead and if you aren’t sure what to do or say, ask!
Talk with your partner openly and honestly. Help them feel comfortable sharing their desires with you, and share yours with them! Verhandeln with them just as you would any other person. Then work together to come up with creative solutions that satisfy both of you.
Here are a few examples that may help spur creativity:
Example 1 – A person with their right arm amputated at the elbow wants to be tied. They want to feel a box tie. They do not wish to wear a prosthesis during the scene.
- This case barely needs any modification at all!
- When it comes to tying, you could use virtually any box tie (e.g. Gote Shibari / TK, Bolero Box Krawatte). The only difference is that you would do the initial Single Column around only one wrist. You need to make sure that the straps pining the upper arms to the body are supported so they cannot slide down over the elbow, but this is a standard feature of both ties.
- If you go with a Gote Shibari in this case, any of the kabuki or 3rd-rope options would work, but the Variante Mt. Fuji might work particularly well.
Example 2 – A person with their leg amputated at the knee wants to feel what it is like to have their legs tied. They do not wish to wear a prosthesis during the scene.
Depending on what they want, there are several ties that could work and require no modification, others will work just fine with just a little additional support to prevent a rope strap from being able to move down over the knee.
Here are a few options you could propose:
- You could use a Fischer-Hobbleskirt.
- You could tie one leg like a Froschfesselung, then tie the other leg to the first leg with a series of Simple Straps.
- You could do any number of variations of Chair Tie oder die Schlafsack.
- You could start with a waist harness, then single columns on each thigh, connected to the waist harness. The person now has a sort of thigh cuffs / garters kind of look. Add a Tragende Doppelsäule above the knees to tie the legs together, then run the tail from that up through both of their thigh cuffs and back. This then ties their knees together, in such a way that the DC cannot slide down.
Special Thanks to our community on Discord and to others that provided their ideas and experiences to this article. Particularly to:
- mntenderhooligan
- Akashic Eden
- piotron
- cade
- Anthoni24
- CalebRavensguard
- MotherRameses
- Rose
- snotskie
Wenn Sie have an experience or idea that you think we should consider adding to this article, please send me your thoughts.

